

Asian painting
INTRODUCTION
The West and the East are distanced by thousands of miles not only geographically, but also culture-wise. The Asian way of life is packed with customs and traditional values that survive to this day. Create a painting that resembles the Asian artwork to celebrate their culture.
The Brush Tool, the Gradient Tool, Layer Masks and other features of Pixelmator are used in this tutorial.
RESOURCES
 PXM File
 Stock photo (Landscape) by Andrew Kudrin
Stock photo (Bird) by VinothChandar
 Watercolor Brush Set
Chinese Symbols Brush Set by superlibbie
STEP 1
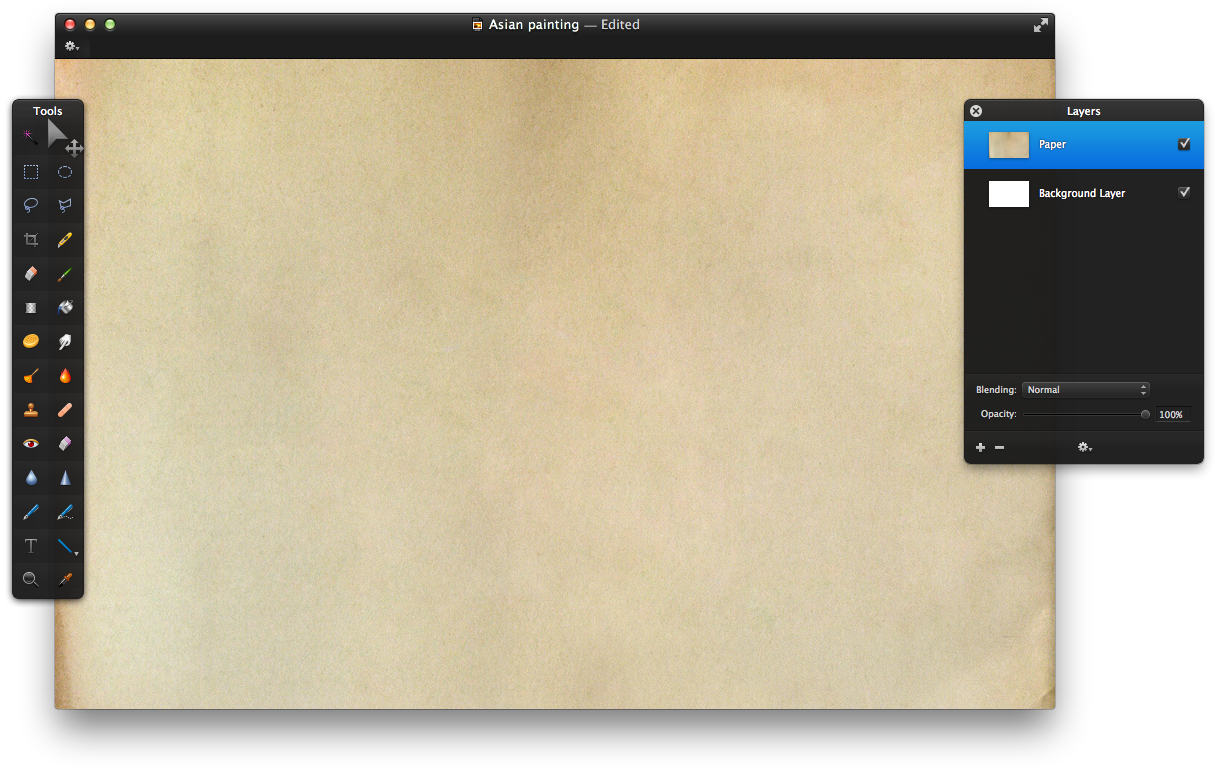
Open Pixelmator and create a new document. The image size used in this tutorial is 1000×650 pixels. Drag the image of the paper onto the Pixelmator canvas. Then, rename the new layer to “Paper” and choose Edit > Rotate 90º Right.
STEP 2
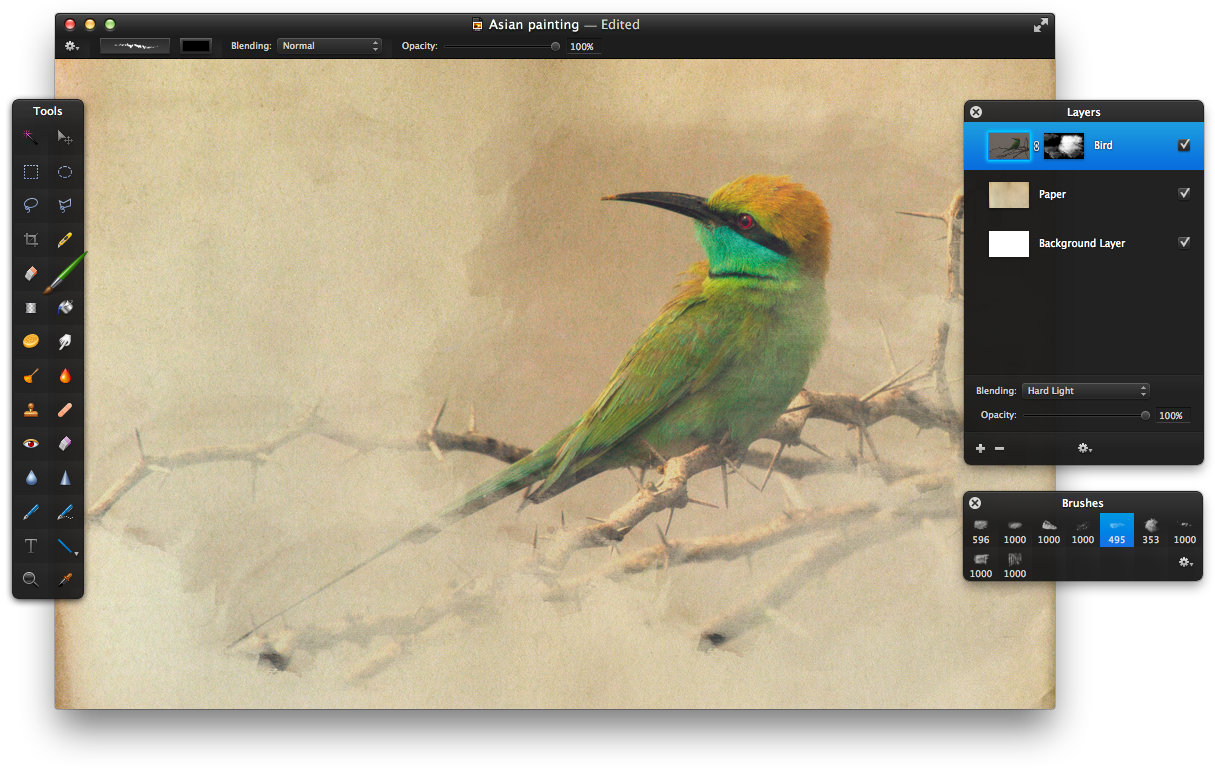
Next, drag the image of the bird onto the Pixelmator canvas and rename the new layer to “Bird”. Choose View > Show Effects to open the Effects Browser. Then, choose the Color Adjustments group in the Effects Browser and double-click the Brightness thumbnail. Set Brightness to -20% and Contrast to -70%. Click OK. Finally, change the “Bird” layer’s Blending to Hard Light.

STEP 3
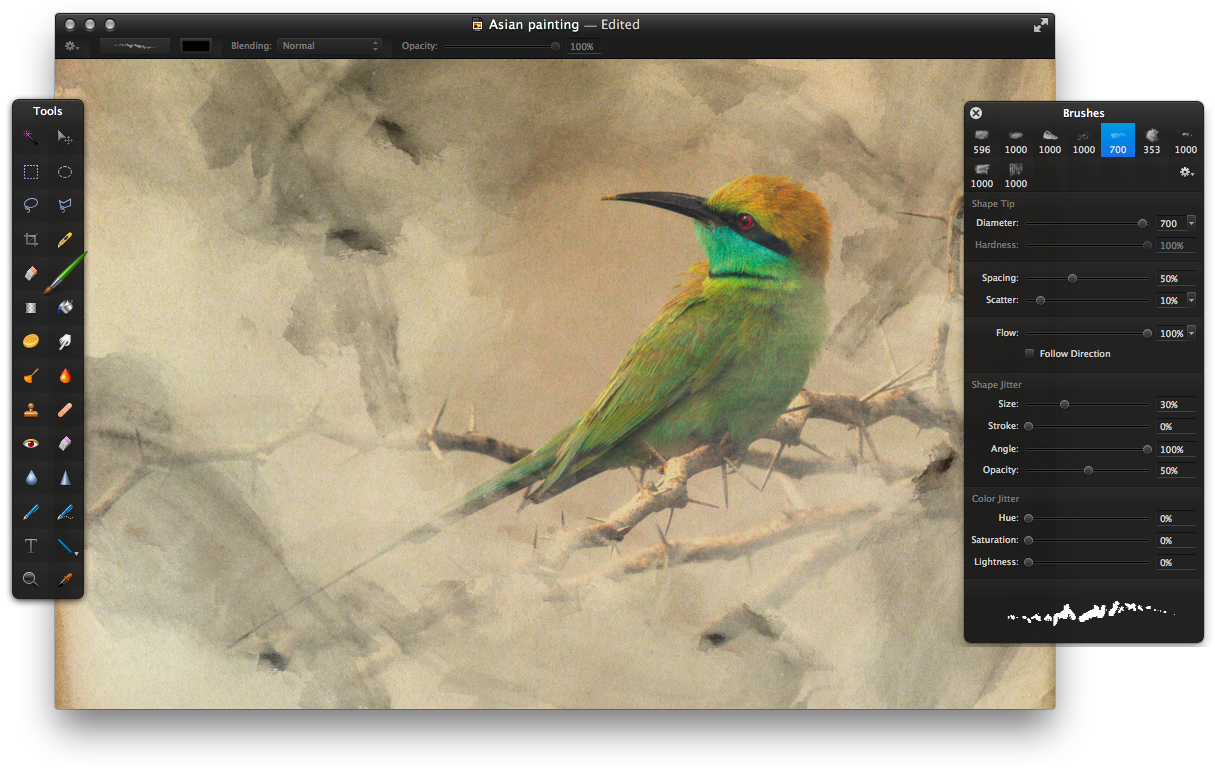
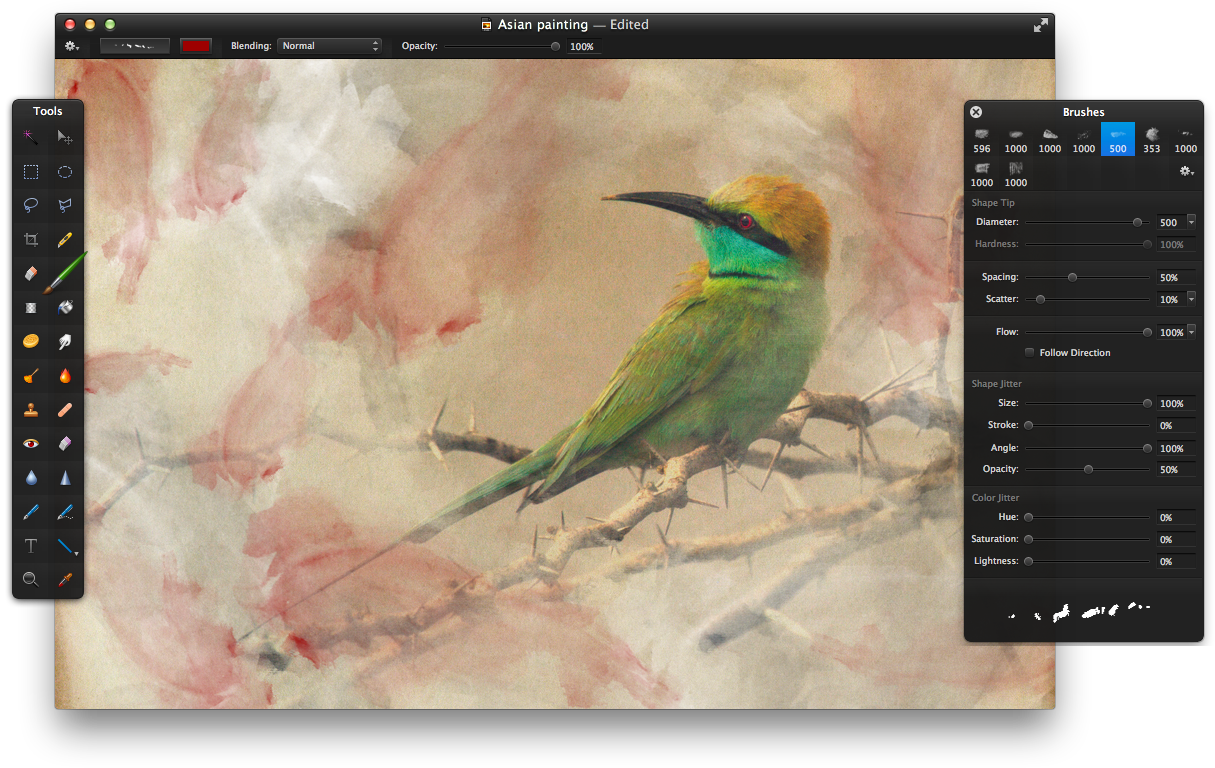
Now, add a layer mask to the “Bird” layer to make the image appear as if it was a watercolor painting. Control-click the layer and choose Add Mask from the shortcut menu. Use the Paint Bucket Tool (N) to fill the mask with black. Then, select the Brush Tool (B) and open the Brushes Palette. Choose View > Show Brushes. Download the watercolor brush set from the resources section and drag the file onto the Pixelmator canvas to import the brushes. Next, select the brush that is situated third from the right in the first row. Add strokes of white in the “Bird” layer’s mask to make part of the image visible. Use the image below as a reference.
STEP 4
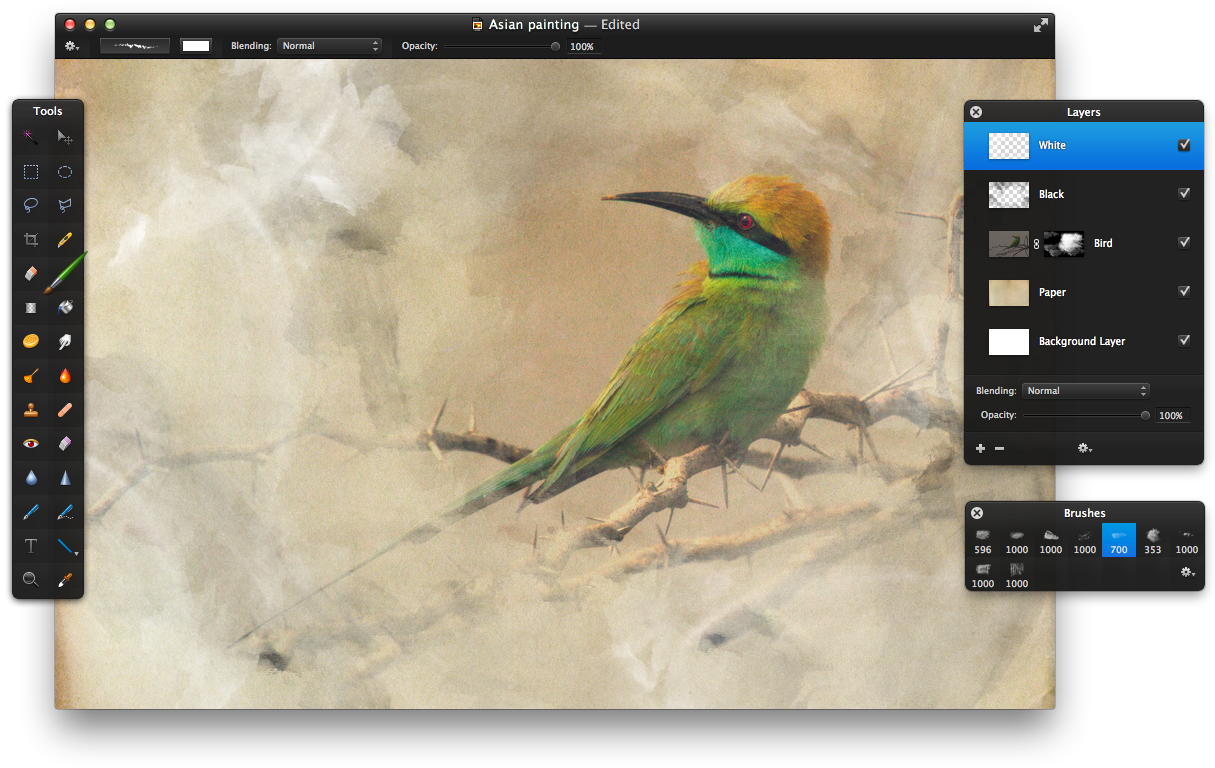
Next, create a new layer and name it “Black”. Then, double-click the brush used in step 3 and change the settings as in the example. The Layers Palette is hidden in the example to allow a better view. Next, fill the “Black” layer with individual strokes of the brush and try to avoid painting over the bird. If a brush stroke does not turn out as expected, simply click Command-Z to undo the previous action. The final result should look similar to the image below. Finally, reduce the layer’s Opacity to 60%.
STEP 5
Now, create a new layer and name it “White”. Select the Brush Tool (B) and fill the layer with strokes of white as in the example. Use the same brush and technique as in step 4.
STEP 6
Next, create a new layer and name it “Red”. Select the brush used in step 5 and double-click it. Then, change the settings as in the example. Finally, fill the “Red” layer with individual brush strokes of red (color code – #800000). The final result should look similar to the image below.
STEP 7
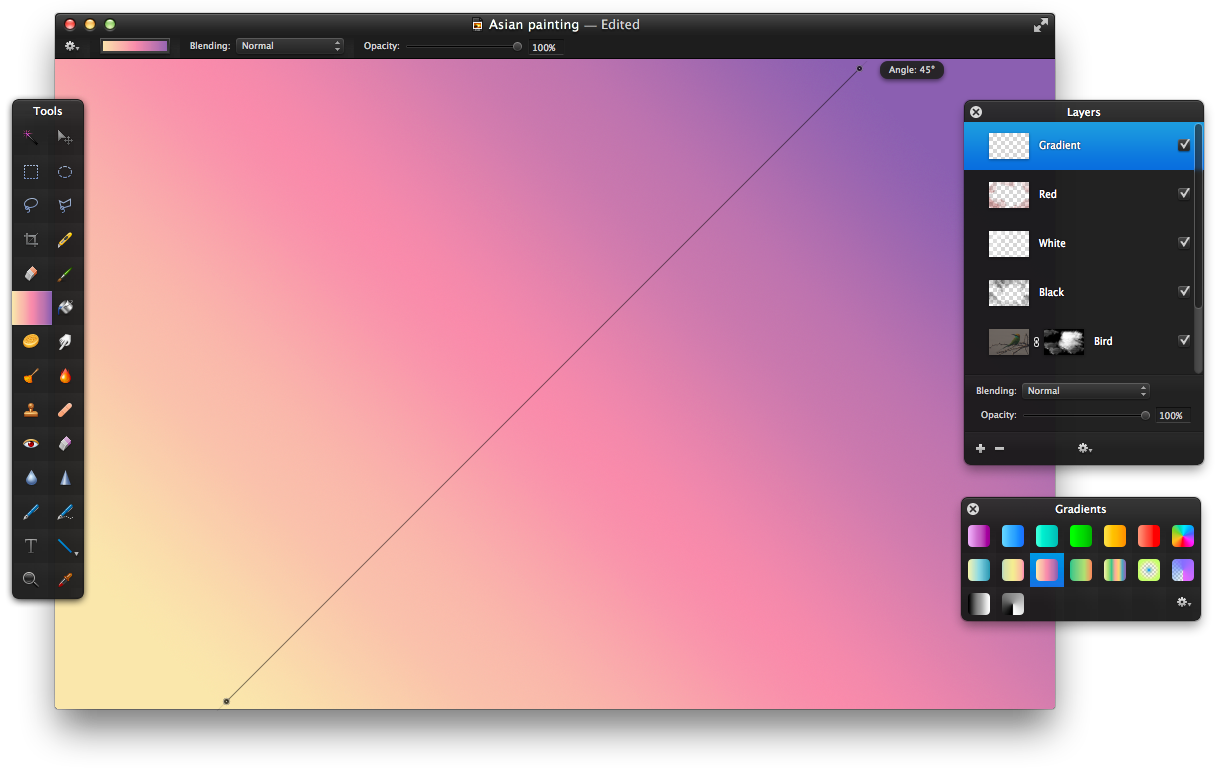
Now, make the colors of the image a bit warmer. Create a new layer and name it “Gradient”. Then, select the Gradient Tool (G) and open the Gradients Palette. Choose View > Show Gradients. Select the gradient that is situated third from the left in the second row and use it to fill the “Gradient” layer as in the example. Then, change the Blending to Soft Light and reduce the Opacity to 70%.
STEP 8
Apply another gradient to darken the colors at the top and bottom of the image. First, open the Gradients Palette and create a new gradient. For further instructions consult the tip below. Next, create a new layer and name it “Gradient 2”. Then, fill the layer with the new gradient as in the example and change it’s Blending to Soft Light.

Tip: To create a gradient used in step 8, first, open the Gradients Palette (View > Show Gradients). Then, click the Action button and choose New Gradient from the shortcut menu and double-click the new gradient to show Brush Settings. Click the left color stop to open the Colors Palette and set the color to black. Then, position the slider above the gradient spectrum at 20%. Next, click the right-color stop and also set it’s color to black. Position the glider above the gradient spectrum at 80%. Now, double-click the gradient spectrum to add a new color stop and position it at 50%. Finally, set the new color stop’s color to black and reduce the Opacity to 0%.

STEP 9
Now, add some Chinese symbols. First, select the Brush Tool (B) and open the Brushes Palette. Choose View > Show Brushes. Then, download the Chinese symbol brushes from the resources section and drag the file onto the Pixelmator canvas. Create a new layer named “Symbols” and use the Brush Tool (B) to draw the symbols that you like. Use the image below as a reference. Finally, change the layer’s Blending to Multiply and reduce the Opacity to 80%.

STEP 10
Next, change the color of some symbols to red. Create a new layer and name it “Color”. Control-click the layer and choose Create Clipping Mask from the shortcut menu. Then select the Brush Tool (B) and use a rounded brush to add strokes of red over the two rightmost symbols. Use the image below as a reference.

STEP 11
Finally, add two black lines at the bottom and top of the canvas to frame the painting. Create a new layer and name it “Frame”. Then, choose View > Show Grid. Use the Rectangular Marquee Tool (M) to make a selection at the top and bottom of the canvas. The selections should be the width of the canvas and height of two subdivisions of a gridline. Finally, use the Paint Bucket Tool (N) to fill the selections with black as in the example.

CONCLUSION
And, that’s it! With Pixelmator it’s easy to bring the traditional arts onto the digital canvas with the help of some well placed brushes.
