
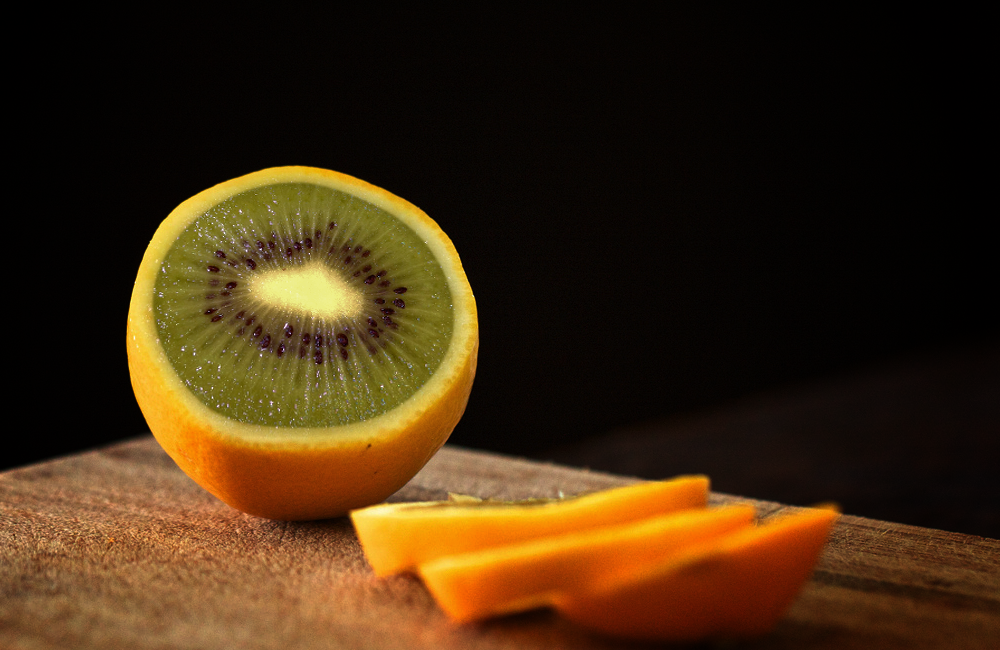
Hybrid fruit
INTRODUCTION
Combine two types of fruit to create surrealistic hybrids. The image of a lemon used in this tutorial is from Chiot’s Run and the kiwi image – from rjime31.
The Blur Filter, the Shape Tools, the Clipping Masks, the Gradient Tools and other features of Pixelmator are used in this tutorial.
RESOURCES
 PXM File
 Stock photo (Lemon) by Chiot’s Run
Stock photo (Kiwi) by rjime31
STEP 1
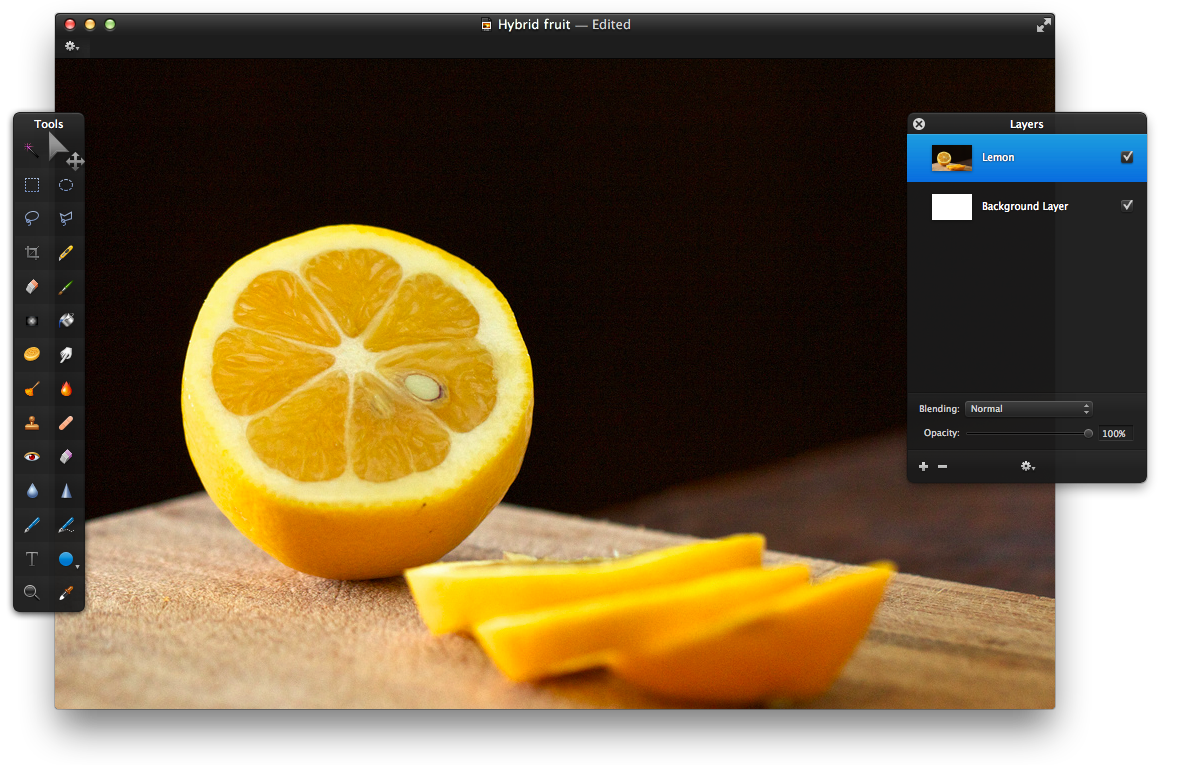
Open Pixelmator and create a new document. The image size used in this tutorial is 1000×650 pixels. Copy and paste the picture of the Lemon. Use the Move Tool (V) to adjust the position of the image.
STEP 2
To create a basis for the kiwi insert, select the Ellipse Shape Tool and draw an oval of any color and name it Kiwi basis. Make sure that the shape covers most of the pulp of the lemon. Use the the image below as a reference.

STEP 3
Make sure that the Ellipse Shape Tool is still selected and double-click the shape to make it editable. This will make the shape’s contours available for manipulation. Drag the existing points to cover the remaining parts of the pulp. Also, add new points and make the shape’s contours align with the Lemon. To add new points, simply double-click anywhere on the contours of the shape. The curvature of the shape can be changed by dragging the handles of the points.

STEP 4
Now copy and paste the kiwi image. To resize the image go to Edit>Transform and reduce the height and width of the image to 50%. Go to Edit>Flip Horizontal and Edit>Flip Vertical. This will flip the image, so that the light reflection on the kiwi matches the lighting source in the lemon image.

STEP 5
To add perspective to the kiwi image go to Edit>Transform. Then click the Action button in the Tool Options bar and choose Perspective. Hold down the Shift key and draw the upper-left handle of the selection to the right until the image looks tilted backward.

STEP 6
Go to Edit>Transform again, deselect the Constrain proportions option in the Tool Options Menu and reduce the height of the image. Use the Move Tool (V) to position the kiwi over the lemon.

STEP 7
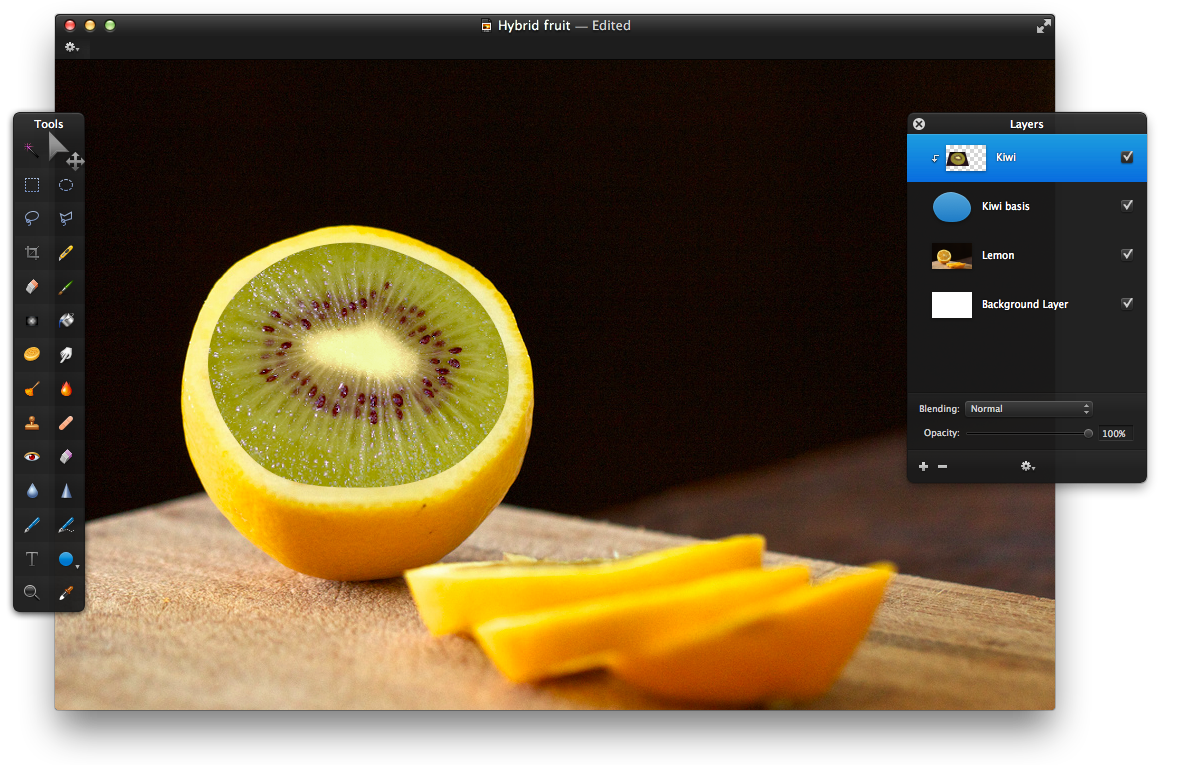
Check if the Kiwi layer is above the Kiwi basis in the Layers Palette. Then right click the Kiwi layer and choose Create Clipping Mask. To make the Kiwi’s colors similar to the background image’s follow these steps:
- Go to Image>Color Balance, select Highlights and set the Magenta/Green to -35%.
- Next, go to Image>Levels, set White to 85% and Grey to 30%.
- Lastly, go to Image>Shadows and highlight and set the Darken Highlights to 50%.
STEP 8
Group the layers to make them more manageable. Select Kiwi and Kiwi basis, right-click and choose Group. Then, rename the group to Kiwi 1. Create a new layer in the group and fill it with a radial gradient using the Gradient Tool (G). Use the image below as a reference and look at the tip if you have trouble creating a new radial gradient. Set the Blending of the Gradient Layer to Soft Light and reduce the Opacity to 40%.

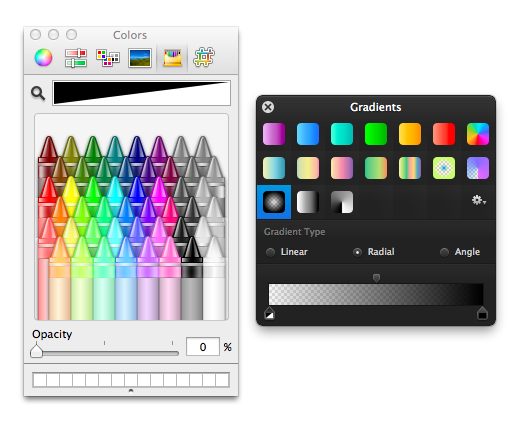
Tip: To create a radial gradient used in this tutorial open the Gradients Palette (View>Show Gradients). Click the action button and choose New Gradient. Select Radial as the Gradient Type (If the Gradient Type is not visible in the Gradients Pallet, double-click your gradient preset). Now, click the right color stop and set it’s color to black in the Colors Palette. Then, click the left color stop, set it’s color to black and reduce the Opacity to 0%.
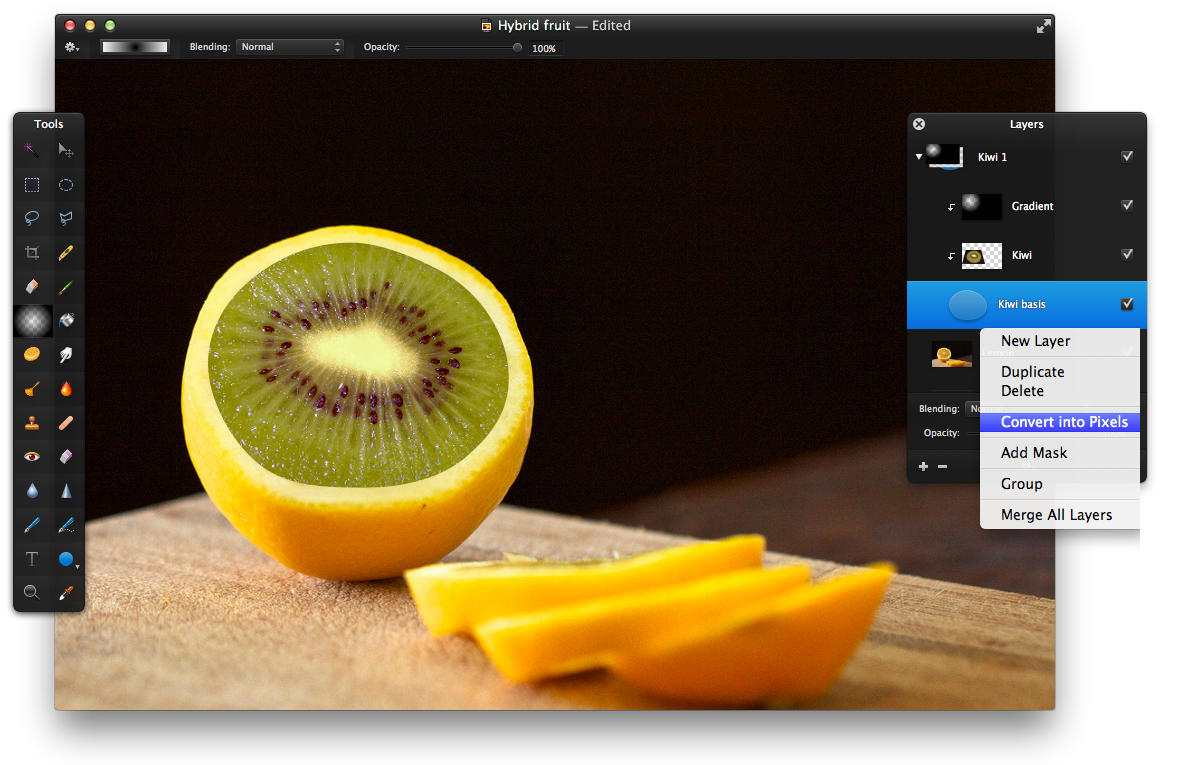
STEP 9
Right-click the group Kiwi 1 and choose Duplicate. Rename the copy to Kiwi 2. Then, right-click the Kiwi basis Layer in the first group and choose Convert into Pixels. Repeat this step on the Kiwi basis Layer in the Kiwi 2 group. This will rasterize the shapes so that filters can be applied.
STEP 10
To make the texture blend in with the background image, select the Kiwi basis layer in the Kiwi 1 group, go to Filter>Blur>Gaussian Blur and set the Radius to 10 px. Then, select Kiwi basis in the Kiwi 2 group and apply the same filter, but this time set the Radius to 1 px.

STEP 11
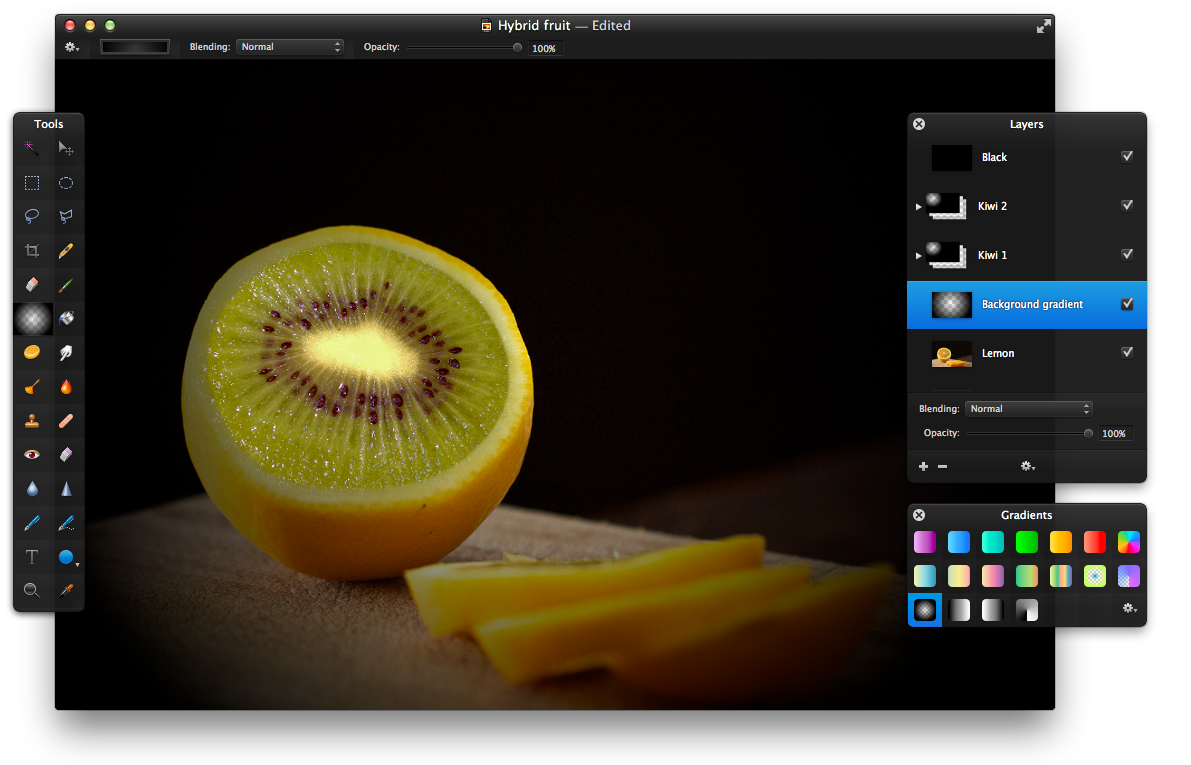
To make the image’s colors more vivid, create a new layer and name it Black. Fill it with black color using the Paint Bucket Tool (N). Then, set the Blending to Soft Light and reduce the Opacity to 20%. After that, create a new layer and name it Background gradient. Place it below the groups Kiwi 1 and 2 in the Layers Palette. Select the Gradient Tool (G) and fill the layer with the previously created gradient. Use the image below as a reference. Lastly, set the layer’s Blending to Soft Light.
CONCLUSION
It can be very entertaining to mix and match contrasting types of fruits, yet remember to select images that have similar lightning and are of high quality.
