

Misty tree
INTRODUCTION
Clouds’ ability to take the shape and form of various objects has fueled people’s imagination for ages. Stock photographs of clouds can be used to add a touch of mysticism to your artwork. Follow this tutorial to create a superb photo-manipulation of a mythical tree.
The Brush Tools, the Gradient Tools, the Filters and other features of Pixelmator are used in this tutorial.
RESOURCES
 PXM File
 Stock photo (Field) by [evancparker]
Stock photo (Cloud) by jojo nicdao
Stock photo (Tree) by Rick Goldwasser Photography
STEP 1
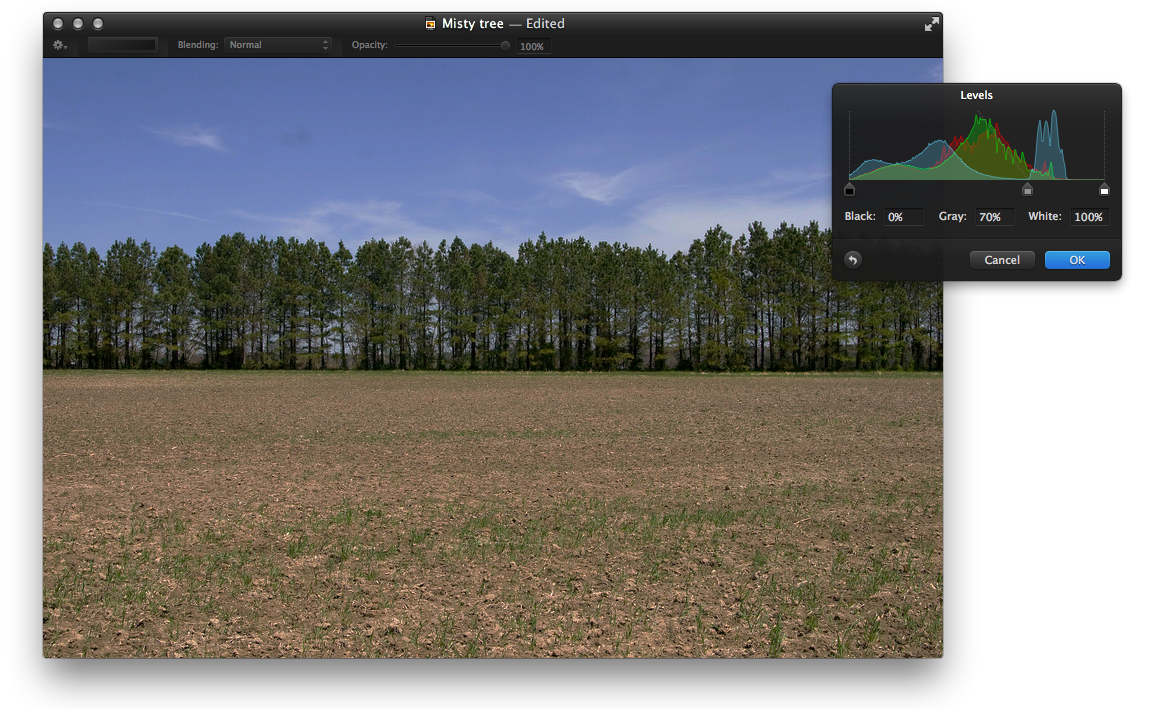
Open Pixelmator and create a new document. The image size used in this tutorial is 900×600 pixels. Copy and paste the picture of the field. To darken the colors of the image go to Image>Levels, set the Gray to 70% and click OK.
STEP 2
Next, let’s add a vignette effect. Create a new layer named Gradient, right-click it and choose Create Clipping Mask. Then use the Gradient Tool (G) to fill the layer with a radial gradient. Use the image below as a reference and consult the tip if you have trouble creating an appropriate gradient.

Tip: To create a gradient used in step 2 open the Gradients Palette (View>Show Gradients). Then click the Action button and choose New Gradient. Click the left color stop to open the Colors Palette. After that set the left color stop’s color to black and reduce it’s Opacity to 0%. Lastly, change the right color stop to black and set the Gradient Type to Radial.

STEP 3
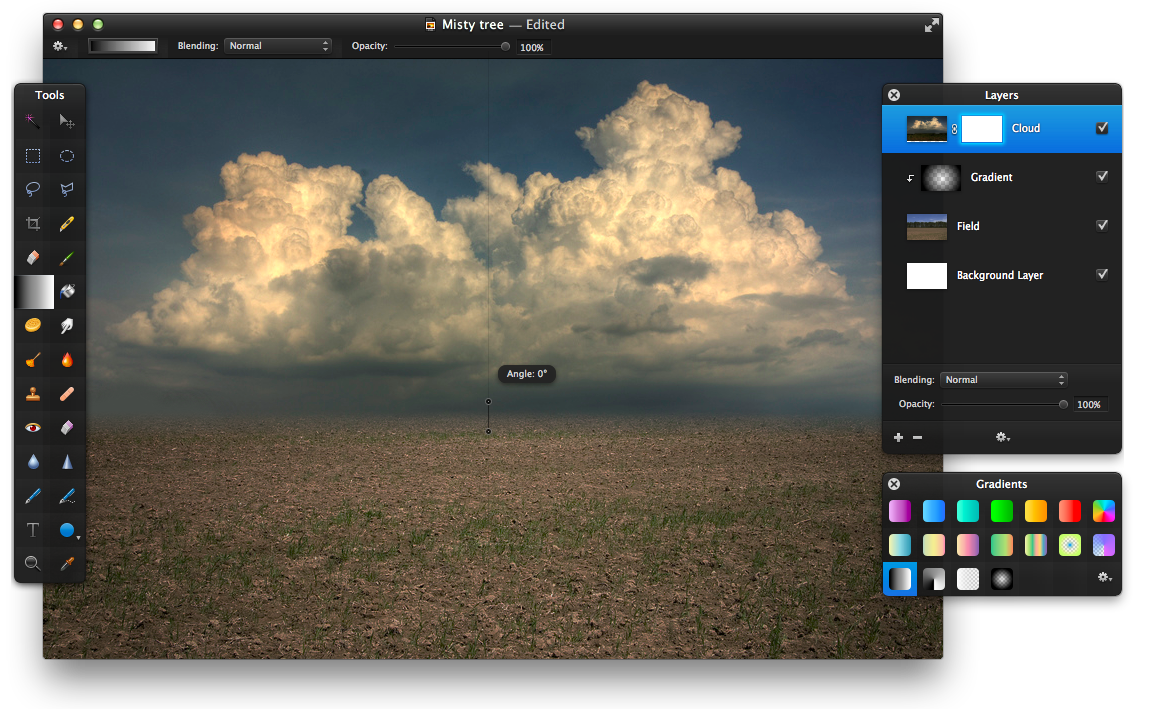
Now, copy and paste the stock photo of the cloud and use the Move Tool (V) to position the image as in the example below. Then use the Brush Tool (B) to cover the trees situated near the horizon with strokes of blue (color code – #383b38).

STEP 4
Add a layer mask to hide the bottom part of the layer Cloud. Right-click the layer and choose Add Mask in the drop-down menu. Then use the Gradient Tool (G) to fill the mask with a black to white gradient as shown in the example below. Lastly, sharpen the image of the cloud. Go to Filter>Sharpen>Sharpen, set the Sharpness to 30% and click OK.
STEP 5
To enhance the colors of the image select the layer Cloud and go to Filter>Quartz Composer>Color Controls. Then change the settings as shown in the example below and click OK. This will darken the colors of the sky and make the contours of the cloud more distinct.

STEP 6
Add a simple gradient to make the line of the horizon a bit more defined. Create a new layer named Gradient. Make sure that it is over the layer Cloud in the Layers Palette, then right-click Gradient and choose Create Clipping Mask. Select the Gradient Tool (G) and use the same gradient as in step 2 only this time change it’s type to Linear. Fill the layer with the gradient as in the example below.

STEP 7
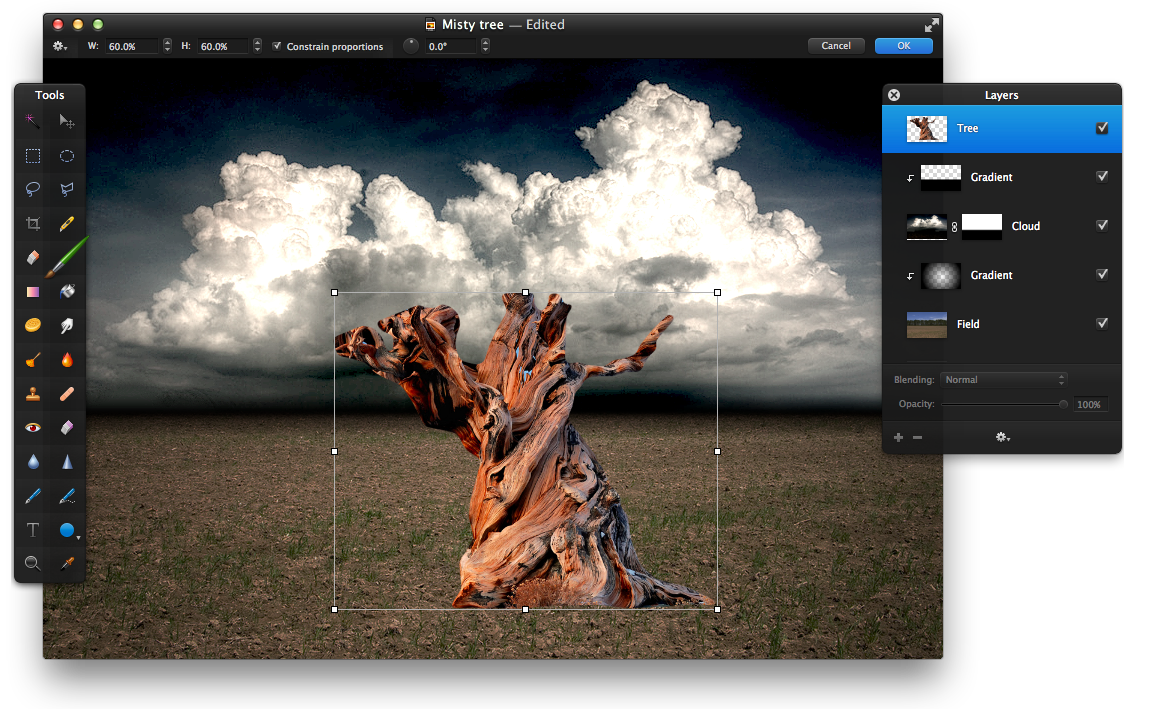
Now copy and paste the image of the tree and flip it horizontally (Edit>Flip Horizontal). Use the Polygonal Lasso Tool to select the outline of the tree. Select only the tree trunk and the thicker branches and try to avoid twigs and lower branches. Use the image below as a reference. After the selection is made go to Edit>Refine Selection, set the Smoothness to 10%, Size to -2px and click OK. Copy and paste the selection into a new layer named Tree. The original image may now be deleted as it will not be used anymore. Then, go to Edit>Transform and reduce the size of the tree to 60%. Lastly, use the Move Tool (V) to position the tree as shown in the example below.
STEP 8
To modify the colors of the tree go to Filter>Quartz Composer>Color Controls. Apply the same settings as shown in the example below and click OK. After that go to Image>Levels, set the Gray to 70% and click OK. This will provide a matte finish for the image of the tree.

STEP 9
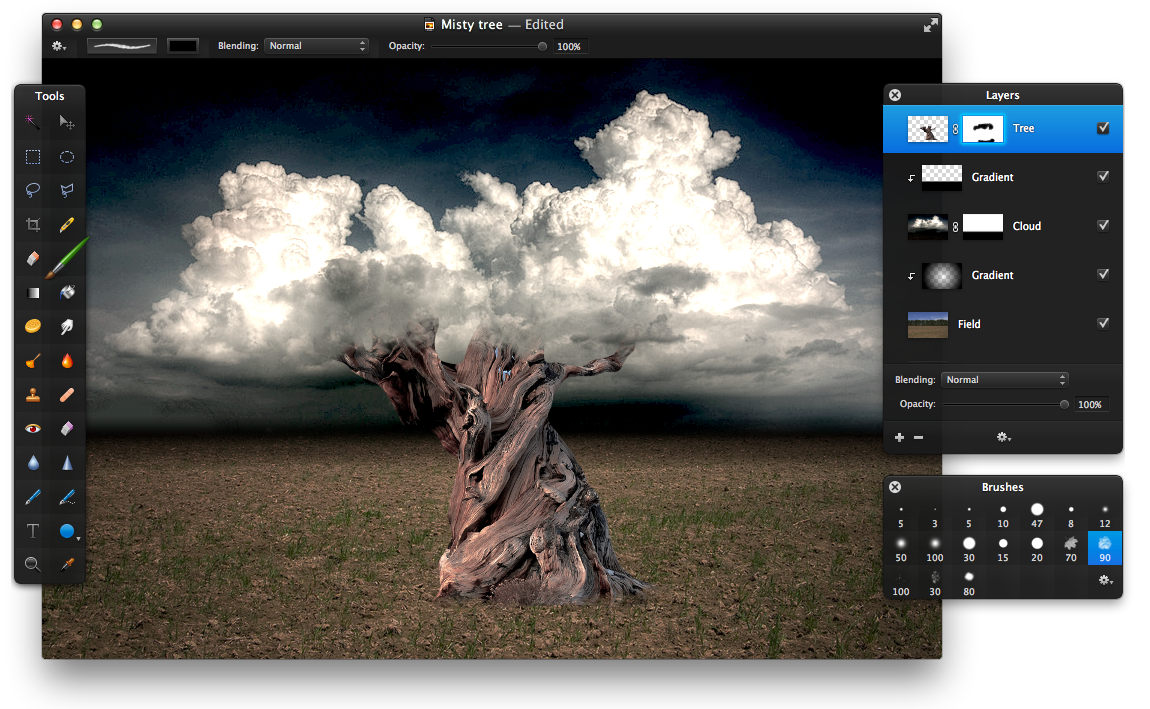
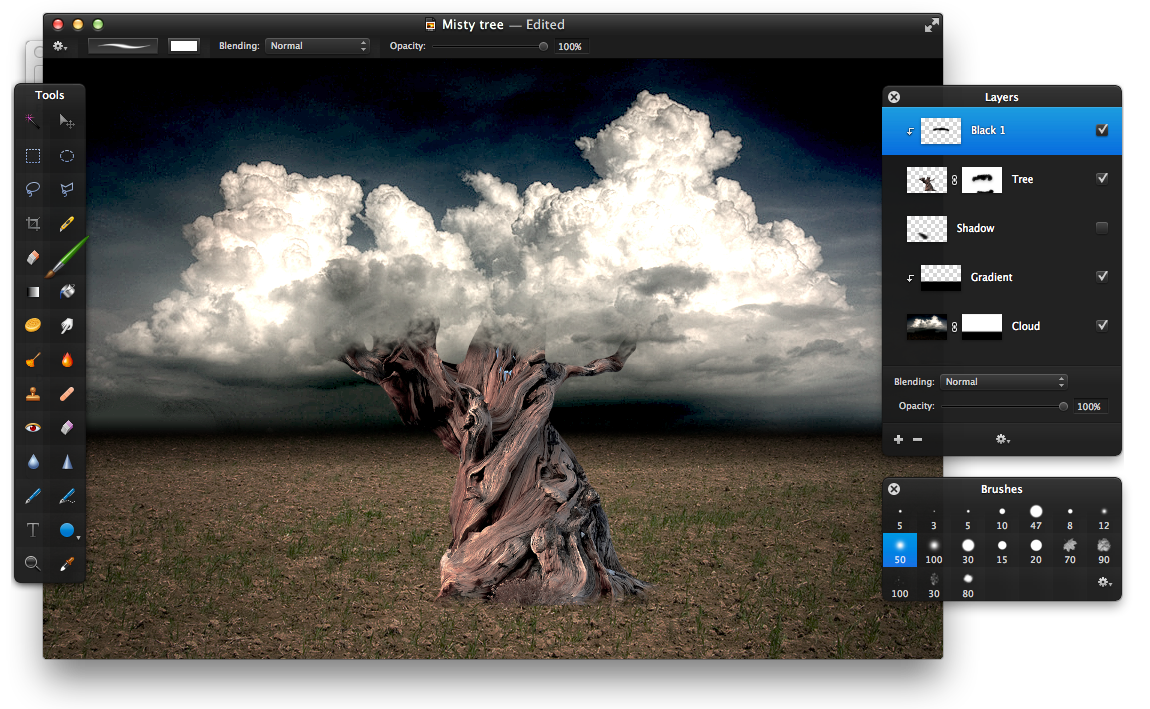
Now let’s hide the branches of the tree in the body of the cloud. Select the Brush Tool (B) and open the Brushes Palette (View>Show Brushes). Then click the Action button in the palette and choose Default in the drop-down menu. Select the brush that is situated first from the right in the second row and use black as the color of the brush. Right-click the layer Tree and choose Add Mask. Then fill the mask with individual strokes of the brush where the branches of the tree come into contact with the cloud. Also add strokes of brush where the roots of the tree touch the ground. The final result should look similar to the image below.
STEP 10
Next, create a new layer named Black 1. Right-click it and choose Create Clipping Mask. Then use a soft rounded brush to add strokes of black where the tree branches are in contact with the clouds. This will create an impression that the cloud is casting a shadow on the branches of the tree.
STEP 11
Now let’s add a shadow on the trunk of the tree. Create a new layer named Black 2, right-click it and choose Create Clipping Mask. Then use a soft rounded brush to add strokes of black to the leftmost part of the trunk. Use the image below as a reference. After that, go to Filter>Blur>Gaussian, set the Radius to 10px and click OK. Lastly, reduce the layer’s Opacity to 70%.

STEP 12
Let’s create an illusion that the light source is in the right side of the image. Create a new layer named White, right-click it and choose Create Clipping Mask. Then use the Brush Tool (B) to add strokes of white on the rightmost part of the tree’s trunk. Use the image below as a reference. Lastly, change the layer’s Blending to Soft Light and reduce the Opacity to 50%.

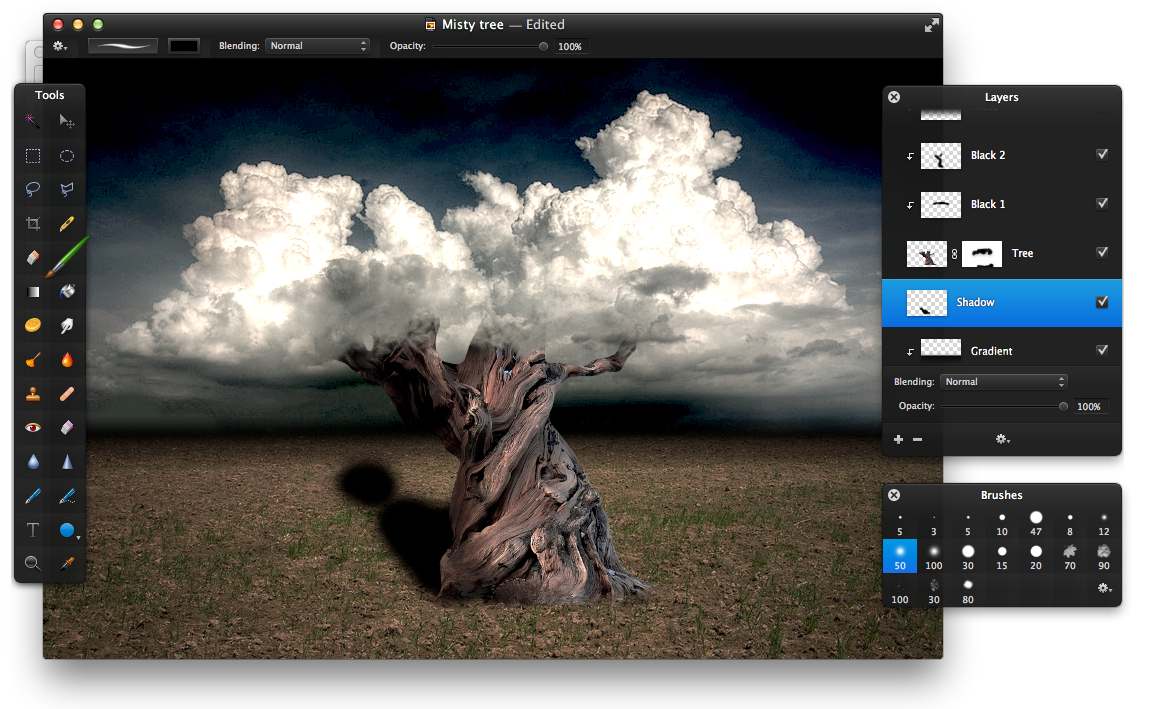
STEP 13
Now, add a shadow to complete the lighting effects. Create a new layer named Shadow and place it below the layer Tree in the Layers Palette. Use the Brush Tool (B) to add strokes of black as in the example below. Then go to Filter>Blur>Motion, set the Radius to 30px, the Angle to 0º and click OK. Lastly, reduce the layer’s Opacity to 70%
STEP 14
To make the colors of the composition more washed out create a new layer named Black. Use the Paint Bucket Tool (N) to fill the layer with black color. Then set the Blending to Color and reduce the Opacity to 20%.

STEP 15
As a finishing touch let’s make the colors of the image warmer and softer. Create a new layer named Color and use the Paint Bucket Tool (N) to fill it with salmon color (color code – #ff6666). Then change the layer’s Blending to Overlay and reduce the Opacity to 10%

CONCLUSION
There are several very important criteria when using stock photographs of clouds. First of all, the cloud should have a suitable shape so that the whole stock photograph may be used. Cutting out parts of the cloud will have a negative impact on how realistic the whole composition looks. Furthermore, colors and contrast of the image are also very important. If the stock photo has washed out colors or multiple artifacts there is a high likelihood that the final result will also be of a poor quality.
