

Summer blues
INTRODUCTION
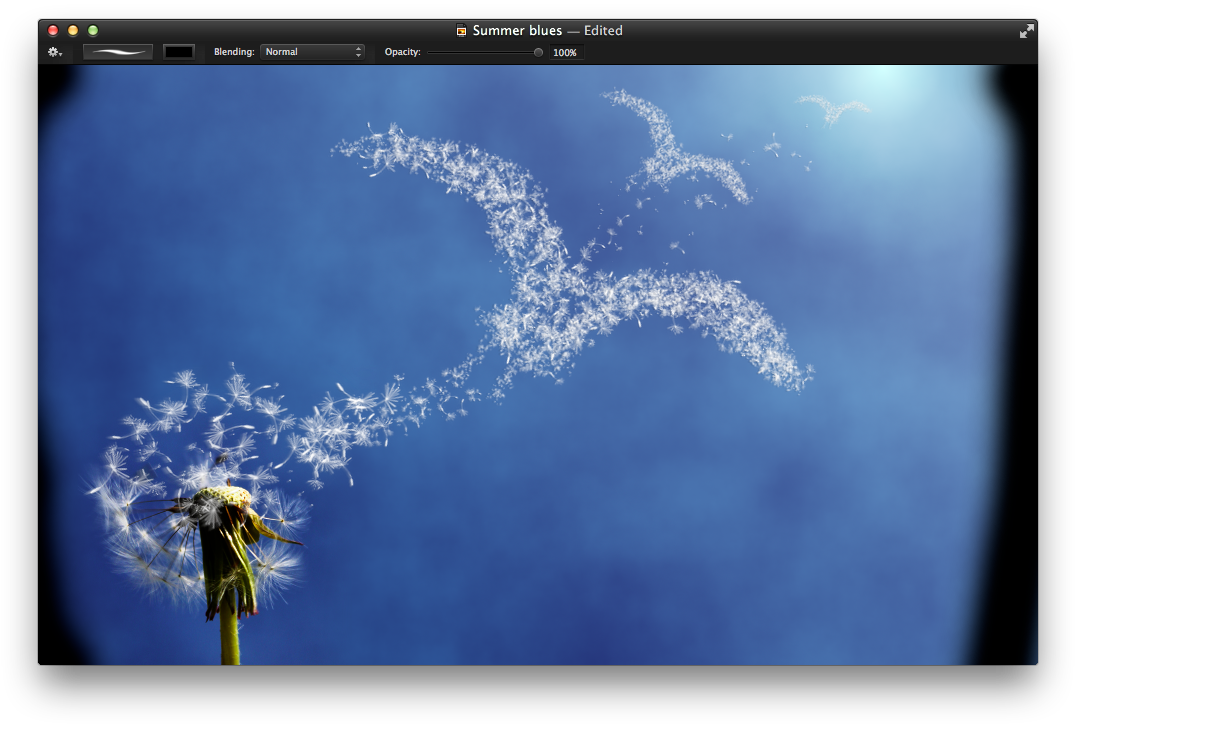
Summertime has come and gone and so have the joys of warm weather. Yet a well rendered image may help you reminisce of the joyful summer days. With Pixelmator, visualising recollections is a breeze.
The Brush Tool, Filters, the Gradient Tool and other features of Pixelmator are used in this tutorial.
RESOURCES
 PXM File
 Image (Dandelion seed)
Stock photo (Dandelion) by geezaweezer
Stock photo (Seagull) by .:.Man!§h.:.
Stock photo (Grungy texture) by ~Brenda-Starr~
STEP 1
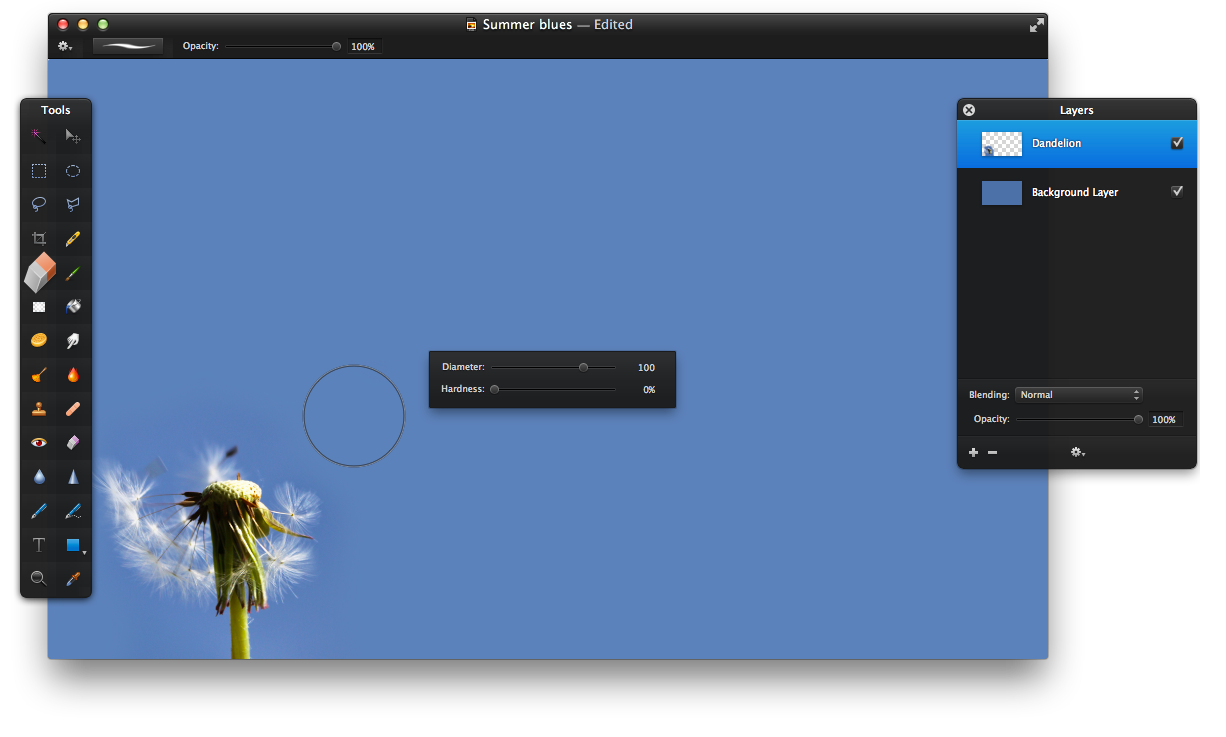
Open Pixelmator and create a new document. The image size used in this tutorial is 1000×600 pixels. Use the Paint Bucket Tool (N) to fill the “Background Layer” with a blue color (color code – #4c71a9).
Next, drag the stock image of the dandelion onto the Pixelmator canvas and rename the new layer “Dandelion”. Then, choose Edit > Transform and resize the image to 50% of the original size. Use the Move Tool (V) to position the dandelion as in the example below.

STEP 2
Now, select the Eraser Tool (E) and control-click anywhere on the canvas to make the shortcut menu appear. Set Diameter to 100 and reduce Hardness to 0%. Then, erase the corners of the dandelion’s image until it blends in nicely with the background. Use the image below as a reference.
STEP 3
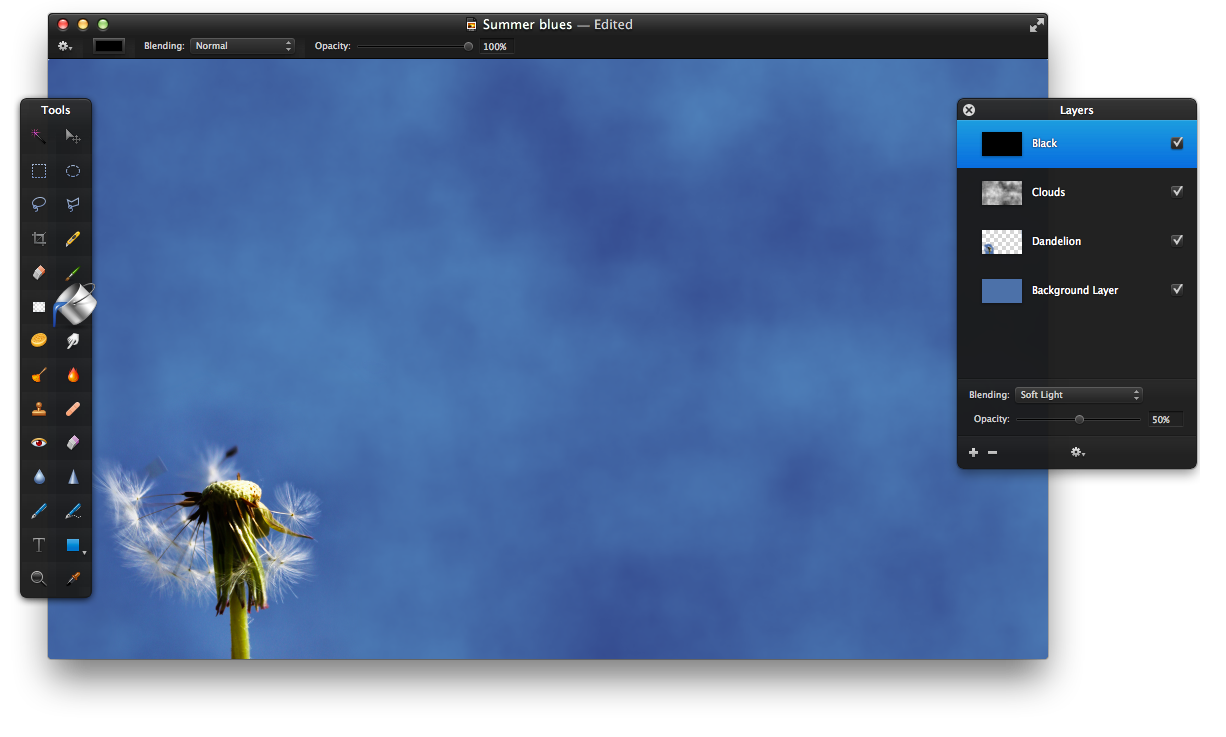
Next, create a new layer and name it “Clouds”. Choose the Generator group in the Effects Browser and double-click the Clouds thumbnail. Click OK in the filter dialog. Then, change the “Clouds” layer’s Blending to Overlay and reduce the Opacity to 30%.
Next, create a new layer and name it “Black”. Fill the new layer with with black using the Paint Bucket Tool (N). Finally, change the layer’s Blending to Soft Light and reduce the Opacity to 50%. The result should look similar to the image below.
STEP 4
Now, create a new layer and name it “Gradient”. Use the Gradient Tool (G) to fill the layer with a black-to-white gradient as in the example below. Then, change the layer’s Blending to Soft Light and reduce the Opacity to 70%.

STEP 5
Next, lets add a glimmer of light at the top right corner of the canvas. Create a new layer and name it “Gradient 2”. Then, fill the “Gradient 2” layer with a white radial gradient as in the example. Consult the tip below for instructions on how to create an appropriate gradient. Finally, change the layer’s Blending to Overlay.

Tip: To create a gradient used in step 5, first, open the Gradients Palette (View > Show Gradients). Then, click the Action button and choose New Gradient from the shortcut menu. Select Radial as Gradient Type and double-click the new gradient to show Brush Settings. Click the left color stop to open the Colors Palette. Then, set the left and right color stops to white, but reduce the right color stop’s Opacity to 0%.

STEP 6
Drag the stock image of the seagull onto the canvas. Then, choose Edit > Transform and increase the image size to 140%. Use the image below as a reference.

STEP 7
Now, create a new brush made up of dandelion seeds. Then, change the brush settings to resize and scatter the image. For further instructions take a look at the tip below.
Next, select the the Zoom Tool (Z) to magnify the image to about 165%. Then, create a new layer named “DS1” and use the Brush Tool (B) to add strokes of the newly created brush inside the outline of the bird as in the image below.

Tip: To create a brush used in step 7, first, open the Brushes Palette. Choose View > Show Brushes. Then, click the Action button in the palette and choose New Brush from Image. Download and locate the image file of the dandelion seed provided in the resources section and open it. Then, double-click the new brush to show the Brush Settings. Set Diameter, Spacing, Scatter, Size and Angle of the brush as in the example. below

STEP 8
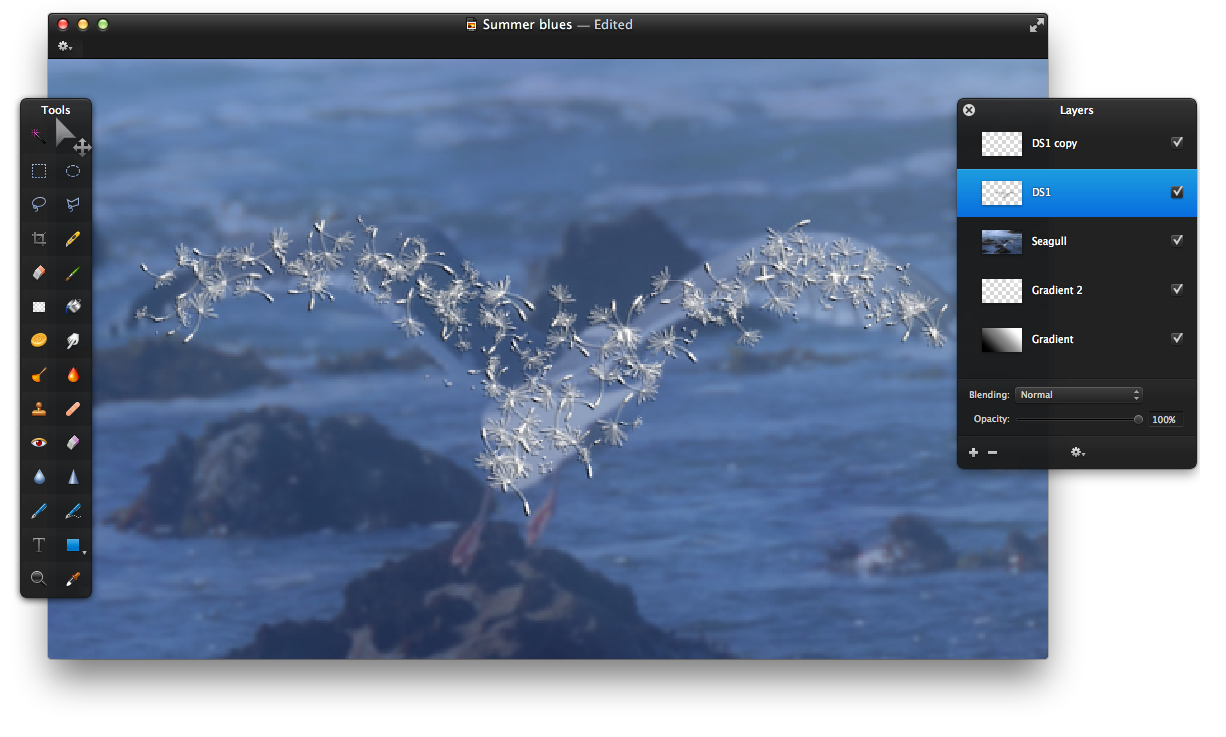
Next, lets make the seeds appear three dimensional. Control-click the “DS1” layer and choose Duplicate from the shortcut menu. Then, select the “DS1” layer and choose Image > Invert Color. Select the Move Tool (V) and use the arrow keys on your keyboard to move the seeds one pixel down and to the left. Use the image below as a reference. Finally, reduce the “DS1” layer’s Opacity to 20%.
STEP 9
Now hide the “DS1” and “DS1 copy” layers by deselecting their checkboxes in the Layers Palette. Then, create a new layer and name it “DS2”. Select the Brush Tool (B) and fill the bird’s shape with the brush used in step 7 only this time reduce the brush diameter to 20 pixels. Use the image below as a reference.
Next, control-click the “DS2” layer and choose Duplicate from the shortcut menu. Then, select the “DS2” layer, invert the layer’ colors and reposition it as described in step 8. Don’t forget to reduce the layer’s Opacity to 20%.

STEP 10
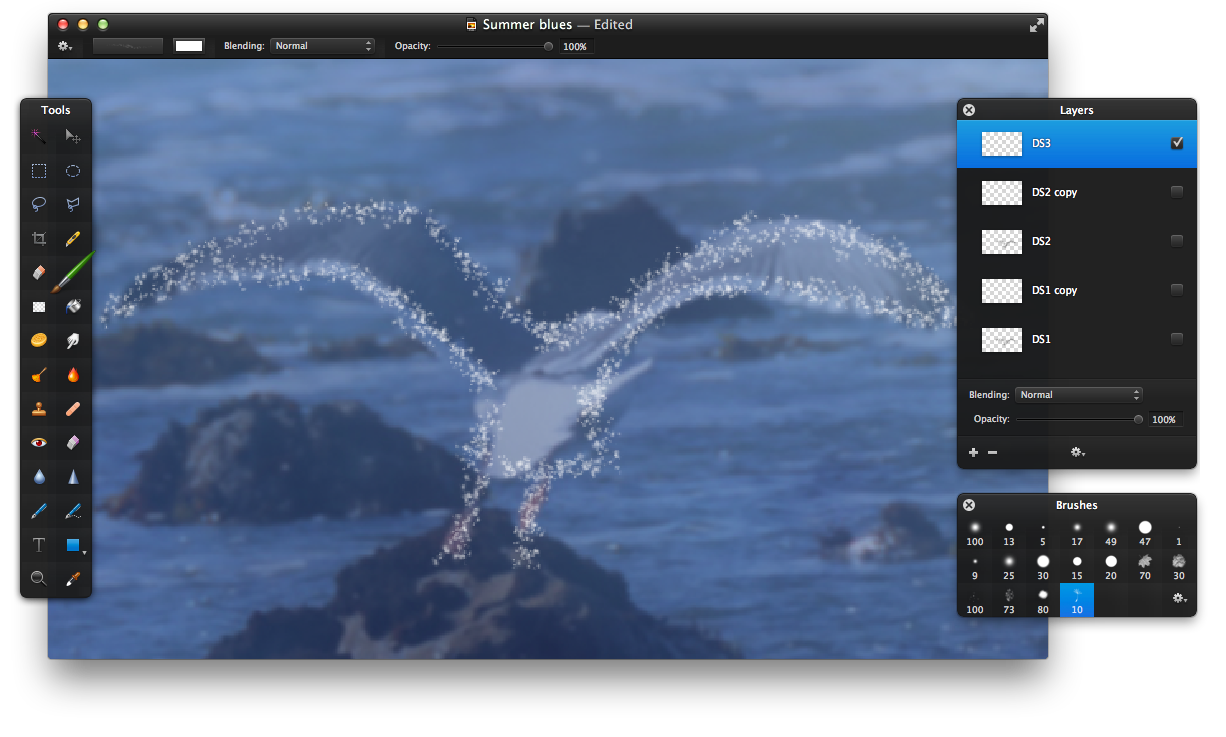
Now lets make the outline of the bird more distinct. Hide the “DS2” and “DS2 copy” layers by deselecting their checkboxes in the Layers Palette. Then, create a new layer and name it “DS3”. Select the Brush Tool (B) and select the brush that was used in steps 7 and 9. Reduce the size of the brush to 10 px and add brush strokes in-line with the bird’s outline. Use the image below as a reference.
Finally, follow the instructions from step 7 to duplicate, invert the colors and reposition the “DS3” layer.
STEP 11
Next, delete the “Seagull” layer as it will no longer be used. Then, unhide all the layers with names that begin with “DS..”. Select all these layers in the Layers Palette. Then, control-click the layers and choose Group from the shortcut menu. Rename the group to “Seagull”. Finally, choose Edit> Transform and rotate the contents of the group as in the example.

STEP 12
Now, add dandelion seed being blown away from the stem of the flower. Create a new layer and name it “DS4”. Select the Brush Tool (B) and use the same brush as in step 7, only this time increase the brush’s size to 60 px. Add strokes of the brush around the dandelion and leading to the bird, but leave some empty space near the bird’s legs. Use the image below as a reference.

STEP 13
Next, make the flow of dandelion seeds more continuous. Use the same brush but reduce diameter to 20 px, Add strokes of the brush to fill the empty space between the bigger dandelion seeds and the bird’s legs. The final result should look similar to the image below.

STEP 14
Now, lets make it appear as if the seeds are in motion. Chose the Blur group in the Effects Browser and double-click the Zoom Blur thumbnail. Then, set the Amount to 0.8 px and use the rope to point to the center of the filter as in the image below. Click OK.

STEP 15
Next, create a flock of seagull’s to fill the empty space in the upper right corner. Select the group “Seagull” in the Layers Palette and control-click it. Choose Duplicate from the shortcut menu. Then, choose Edit > Transform, reduce the size of the selection to 35% and rotate it by 10 degrees. Use the Move Tool (V) to position it above the bigger seagull as in the image below.

STEP 16
Next, duplicate the group “Seagull” one more time and choose Edit > Transform. Reduce the new copy’s size to 15% and rotate it by 340 degrees. Then, use the Move Tool (V) to position it near the upper right corner of the canvas. The final result should look similar to the image below.

STEP 17
Add some scattered dandelion seed beneath the flock of seagulls. First, create a new layer and name it “DS5”. Select the Brush Tool (B) and select the brush used in step 7. Open the brush settings by double-clicking the brush in the Brushes Palette. Then, set Diameter to 20 px and increase both Spacing and Scatter to 60%. Add strokes of the brush near the bodies of the birds as in the example below.
Finally, follow the instructions from the step 8 to duplicate the “DS5” layer, invert it’s color and reposition it. Don’t forget to reduce the Opacity.

STEP 18
Now add some minor vignetting. The Tools, Layers and Brushes Palettes are hidden in the example below to allow for a clearer view. First, create a new layer named “Vignette”. Then, select the Brush Tool (B) and select any round brush. Double-click the selected brush in the Brushes Palette, set it’s Diameter to 100 px and reduce Hardness to 0%. Add strokes of black in the corners and the sides of the canvas. Use the image below as an example.
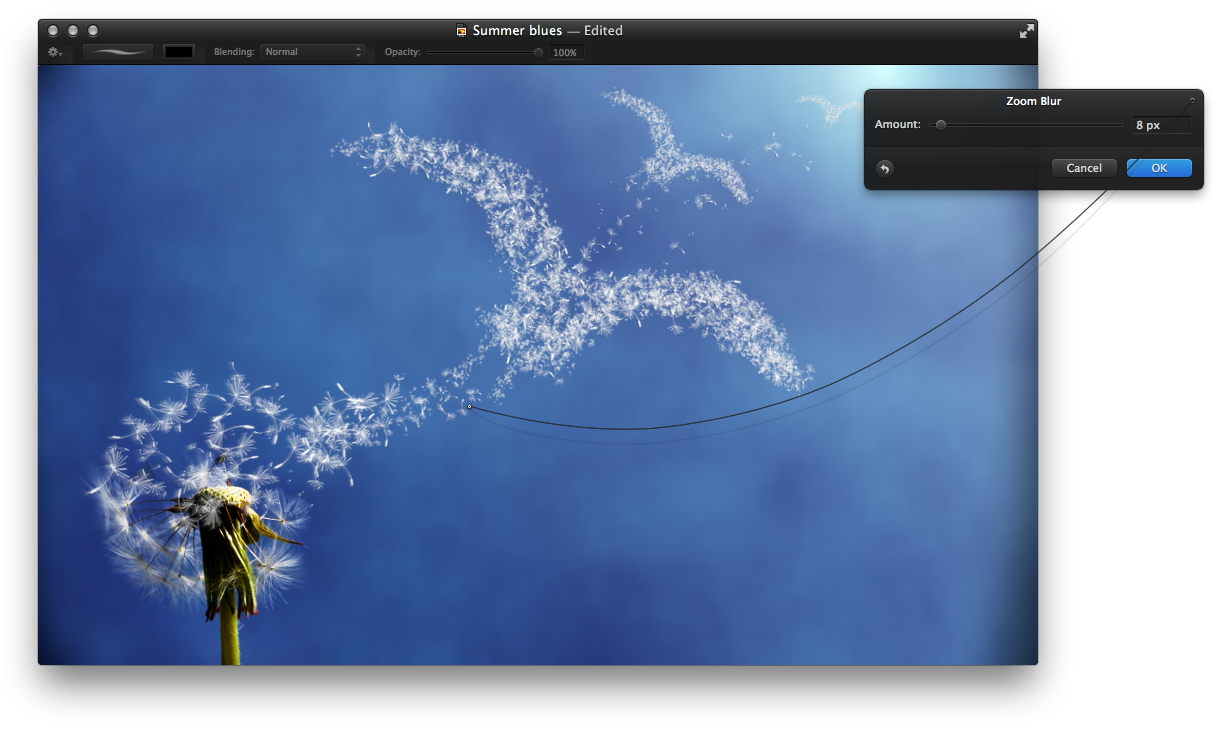
STEP 19
Next, choose the Blur group in the Effects Browser and double-click the Zoom Blur thumbnail. Set the Amount to 8 px in the filter dialog. Use the rope to point to the center of the canvas as in the image below. Click OK.
STEP 20
Finally, lets apply a grungy texture to the overall composition. Drag the grungy texture to the canvas of Pixelmator. Change the layer’s Blending to Overlay and reduce the Opacity to 25%.

CONCLUSION
Congratulations, you’re done! Pixelmator makes it easy to create uplifting images that can brighten your mood on gloomy days.
