

Vinyl record
INTRODUCTION
Create a realistic image of a vinyl record from scratch with Pixelmator in 9 simple steps.
The Filters, the Shape Tools, the Clipping Masks and other features of Pixelmator are used in this tutorial.

RESOURCES
 PXM File
STEP 1
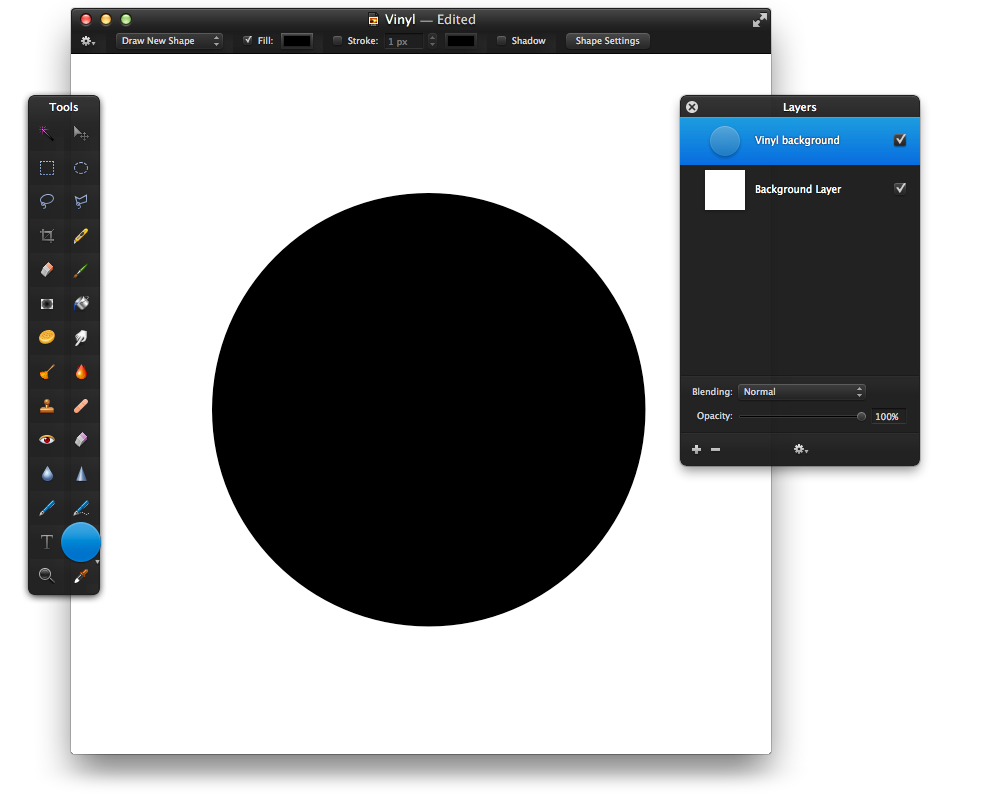
Open Pixelmator and create a new document. The image size used in this tutorial is 700 by 700 pixels. Select the Ellipse Shape Tool and draw a black circle for the basis of the vinyl record. Be sure to hold down the Shift key while drawing to keep the shape circular.
STEP 2
Now, add grooves to the vinyl record. Here’s how to do it:
- Create a new layer named “Grooves” and fill it with black using the Paint Bucket Tool.
- Choose the Stylize group in the Effects Browser (View > Show Effects) and double-click the Noise thumbnail. Then, set the Amount to 10% and click OK.
- Choose the Distortion group in the Effects Browser and double-click the Circular Wrap thumbnail. Set the Radius to 1px and use the rope to point to the center of the vinyl. Click OK.
- Resize the “Grooves” layer (Edit > Transform) to the same width and height as the “Vinyl background” layer.

STEP 3
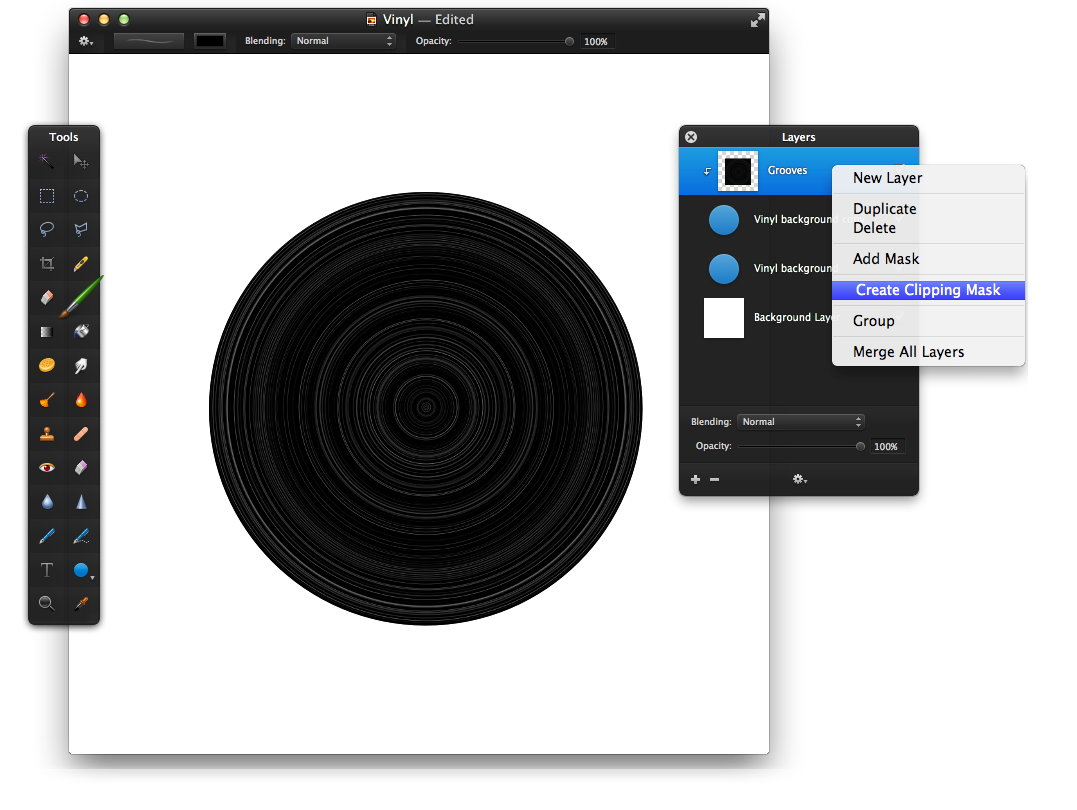
Now, add a clipping mask to hide the corner parts of the “Groove” layer. First, Control-click the “Vinyl background” layer and choose Duplicate. Then, rename the new layer to “Groove basis” and Control-click it. Choose Create Clipping mask from the shortcut menu. If needed, use the Move Tool to reposition the grooves.
STEP 4
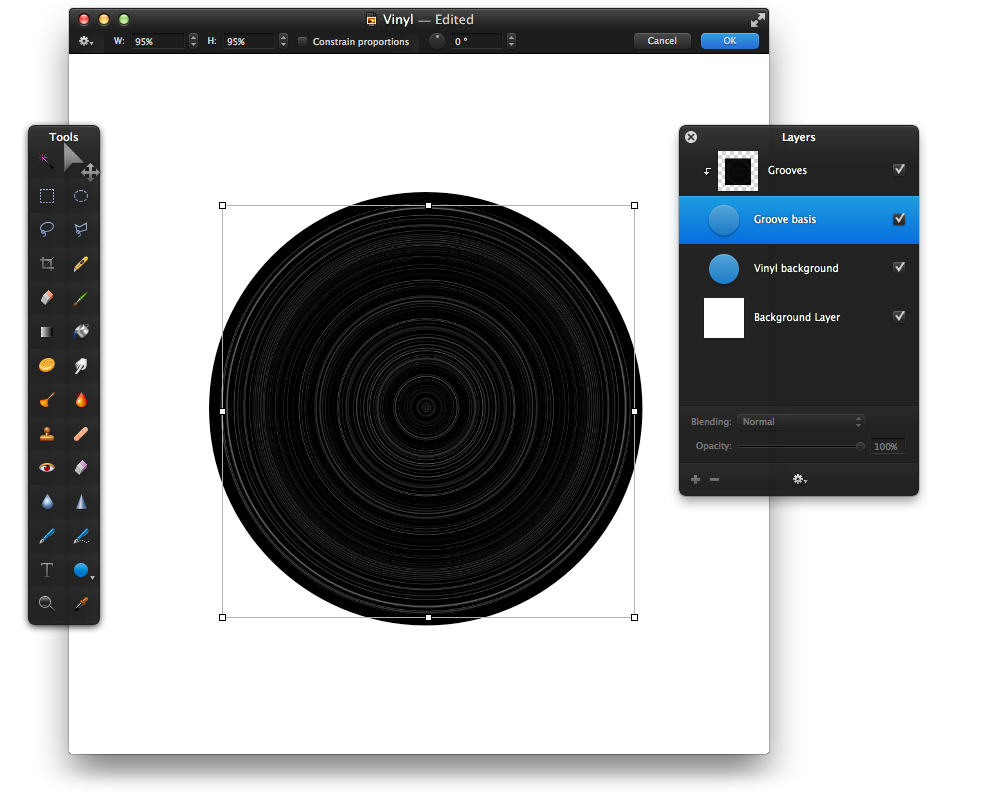
Next, add a rim to the vinyl record. Select the “Groove basis” layer and choose Edit > Transform. Then, reduce the shape’s width and height to 95% in the Tool Option bar.
STEP 5
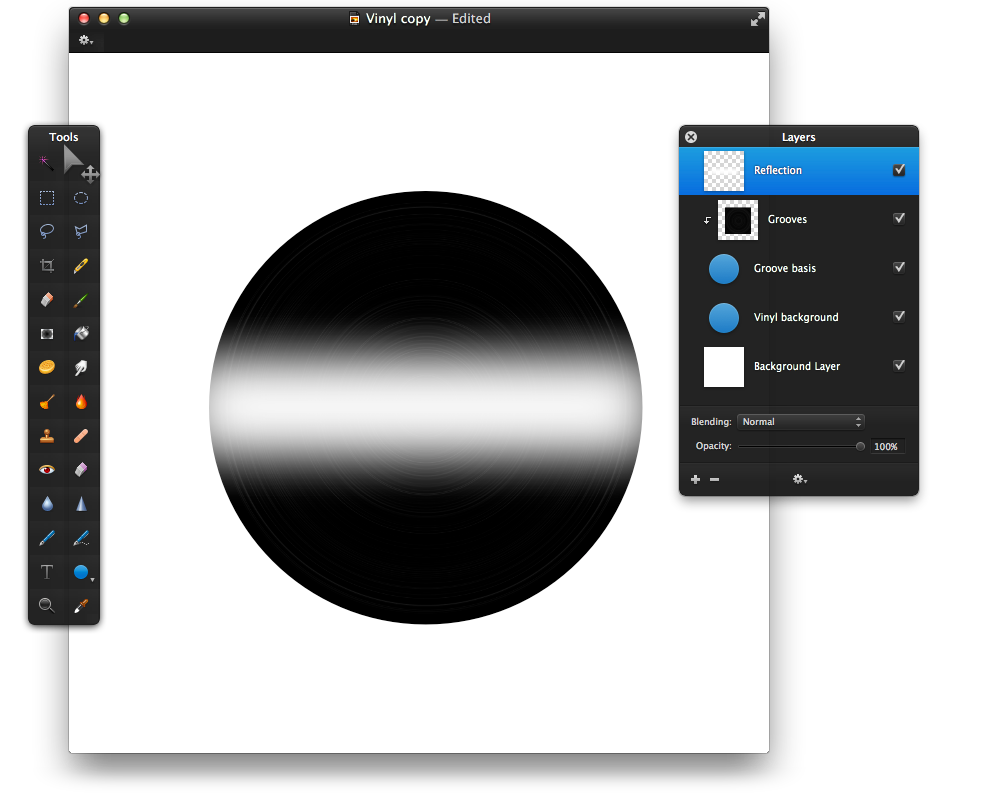
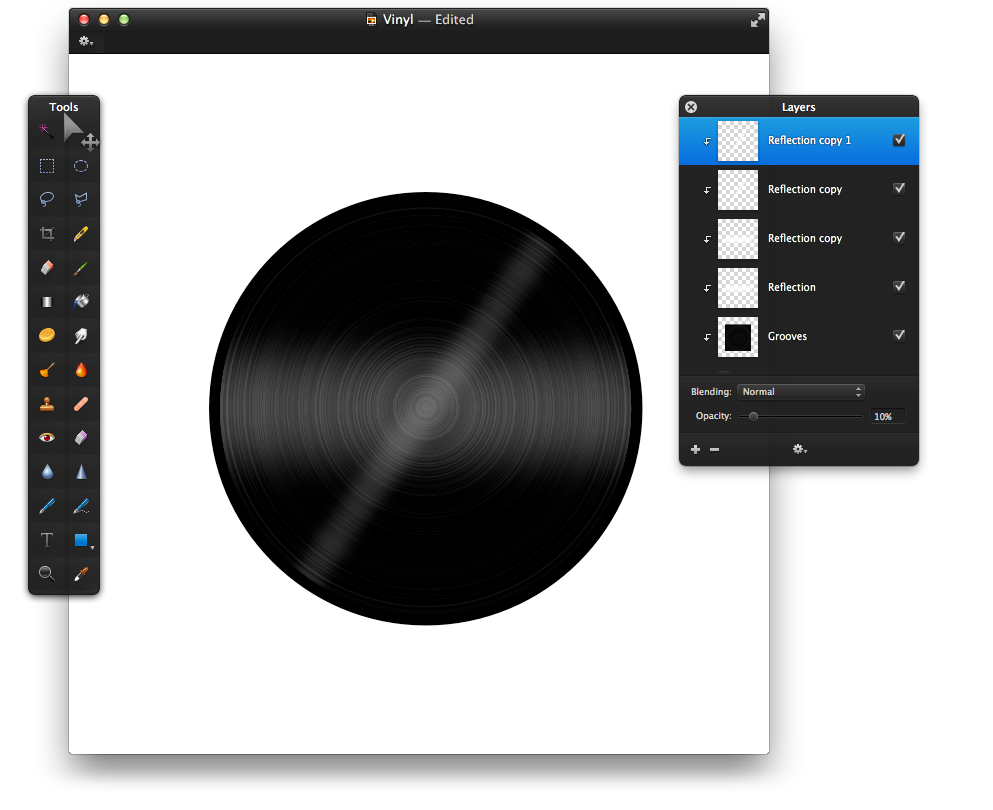
Add a gleam of light on the record’s surface. First, reduce the “Grooves” layer opacity to 20%. Then, create a new layer and name it “Reflection”. Choose the Rectangular Marquee Tool and draw a rectangle that’s the same width as the vinyl, but about 1/5th of the height. Choose Edit > Refine Selection, set the Feather to 50% and click OK. Finally, use the Paint Bucket Tool to fill the selection with white color.
STEP 6
Now, Control-click the “Reflection” layer and choose Create Clipping Mask from the shortcut menu. Set the Blending to “Soft-light” and reduce the Opacity to 40%. Then, duplicate the “Reflection” layer (Control-Click > Duplicate). Change the duplicate’s Blending to “Normal” and reduce the Opacity to 20%.
Then, add another smaller reflection of light. First, select the “Reflection” and “Reflection copy” layers and duplicate them. Then, choose Edit > Transform and reduce the height of both layers. After that rotate the layers by about 50 degrees and reduce the opacity of both layers by half (10% and 20%). The result should look similar to the image below.
STEP 7
Now, make the grooves a bit crooked. First, duplicate the layer “Grooves” and rename it to “Noise”. Then, choose the Stylize group in the Effects Browser and double-click the Noise thumbnail. Set Amount to 100% and deselect the Monochrome option. Click OK. Position the “Noise” layer above all other layers in the Layers Palette. Finally, change it’s Blending to “Overlay” and reduce the Opacity to 10%.

STEP 8
Create a groove-less area in the middle where the vinyl sticker will go. Use the Ellipse Shape Tool to draw a black circle and position it like in the example below.

STEP 9
Now, select the Ellipse Shape Tool and draw a yellow sticker. Rename the new layer to “Sticker”. Finally, use the Ellipse Shape Tool to draw a white spindle hole in the middle of the vinyl.

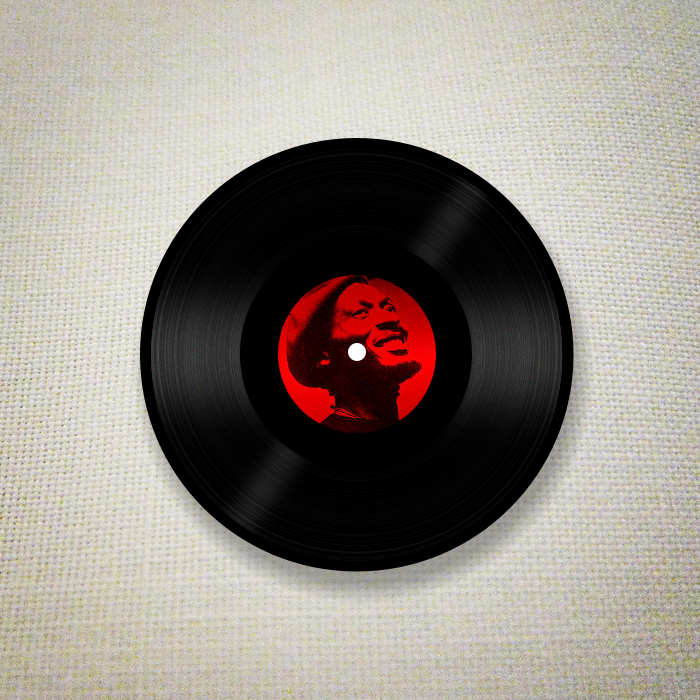
CONCLUSION
Liven up the vinyl record by using an image instead of a single colored sticker. Also, a well chosen background can make the composition look much more realistic. The image for the sticker used in this example is from Luiz Fernando/Sonia Maria, and the background is from vidalia_11.