

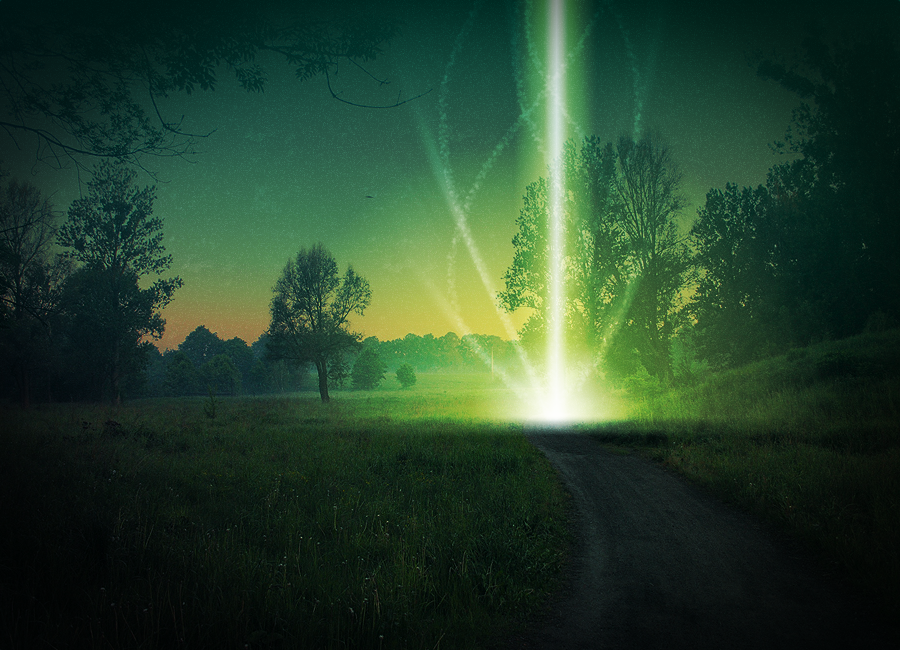
Wondrous journey
INTRODUCTION
The well known proverb says that life is a journey. However it is a most unclear and ever-changing one. Follow this tutorial to create a photo-manipulation depicting the wondrous journey that life is.
The Gradient Tools, Layer Blending, the Brushes, the Blur Filters and other features of Pixelmator are used in this tutorial.
RESOURCES
 PXM File
 Stock photo (Countryside) by micorasol
STEP 1
Open Pixelmator and create a new document. The image size used in this tutorial is 900×600 pixels. Copy and paste the picture of the countryside. Rename the new layer to Road.

STEP 2
Next, create a new layer and name it Gradient. Fill the layer with a linear gradient that consists of a blue color (color code – #014d4d) and a transparent color. Use the image below as an example and consult the tip below step 5 if you have trouble creating an appropriate gradient.

STEP 3
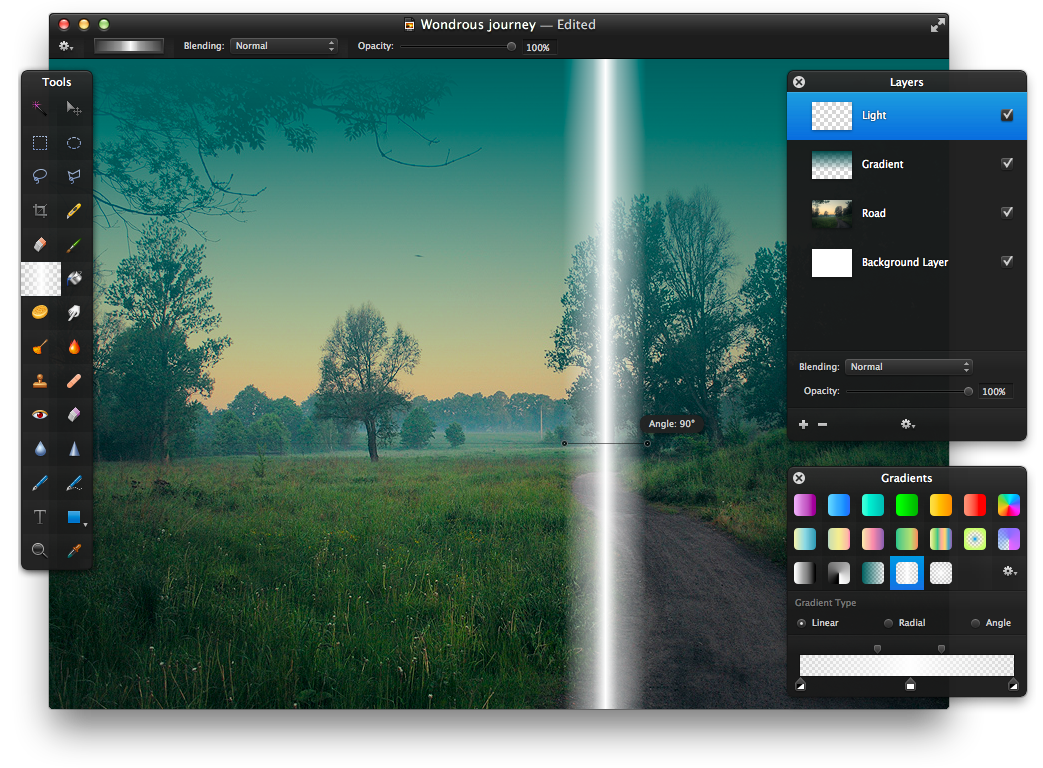
Now let’s start working on the special effects. First, create a new linear gradient. Further instructions are provided in the tip below. Then, create a new layer named Light and use the Gradient Tool (G) to draw a ray of light as it is shown in the example below.
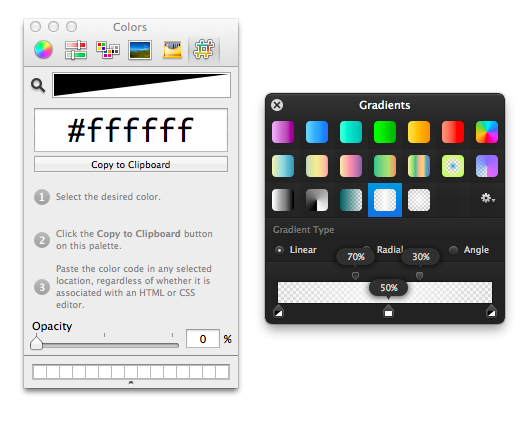
Tip: To create a gradient used in step 3 open the Gradients Palette (View>Show Gradients). Then click the Action button and choose New Gradient in the drop-down menu and set it’s type to Linear. Click the left color stop to open the Colors Palette, set the color to white (color code – #ffffff) and reduce the Opacity to 0%. Repeat the same actions on the right color stop. Then click the gradient spectrum to add a new color stop. Set it’s color to white but this time leave the Opacity at 100%. Position the new color stop in the middle of the gradient spectrum. After that, make sure that the new color stop is selected and position the sliders above the gradient spectrum at 70% and 30% as shown in the image below. The gradient is now ready to use.
STEP 4
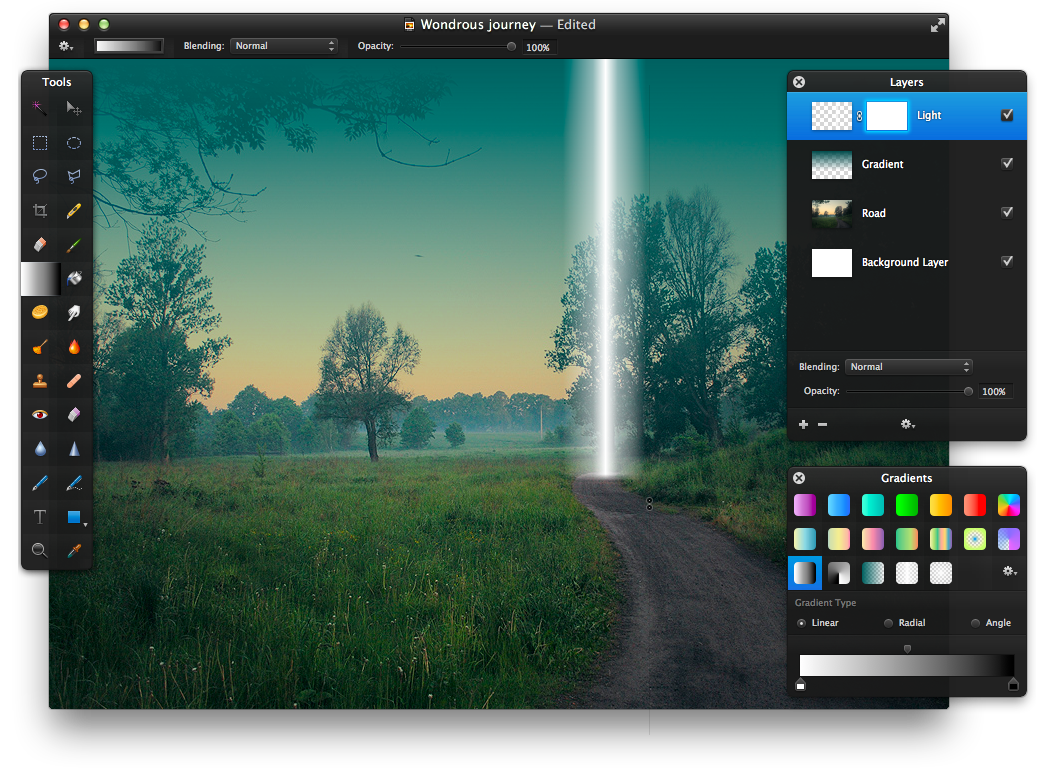
Next, right-click the layer Light and choose Add Mask. Use the Gradient Tool (G) to fill the mask with a white to black gradient as in the example below. This will hide unnecessary parts of the image in the layer Light. After that, reduce the layer’s Opacity to 60%.
STEP 5
To give the the ray of light a warm yellowish color duplicate the layer Light. Then go to Image>Colorize, increase the Saturation to 80%, spin the button around the color wheel until it is positioned at 60º and click OK. After that, change the layer’s Blending to Overlay and leave the Opacity unchanged.

STEP 6
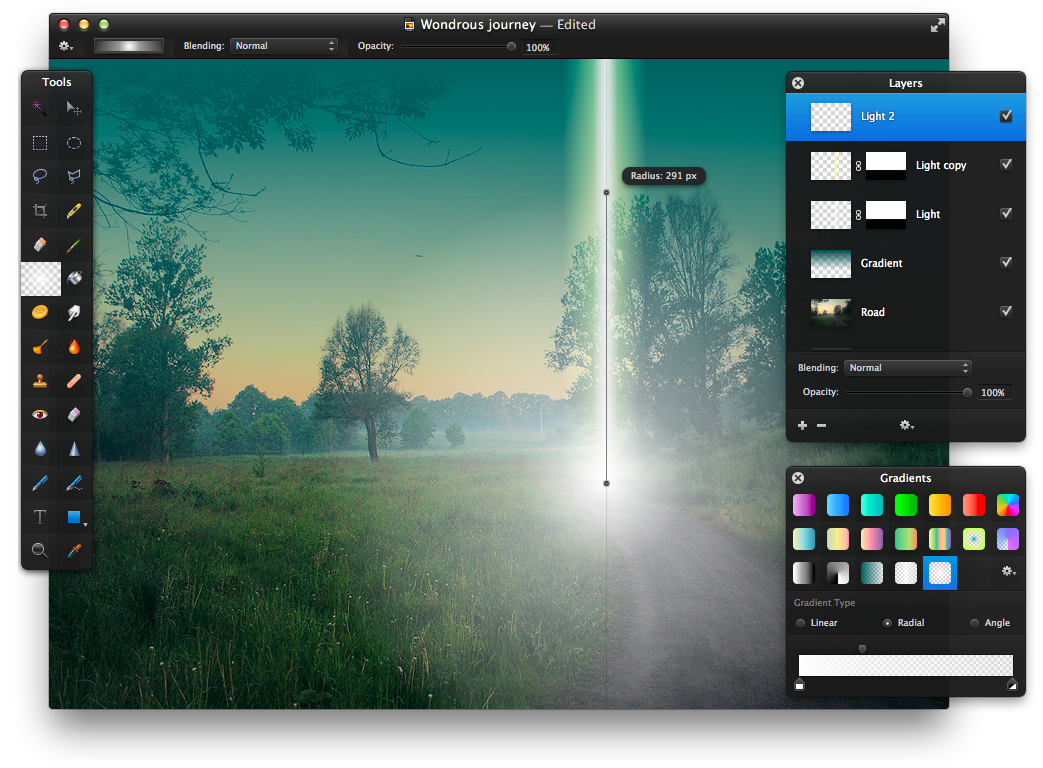
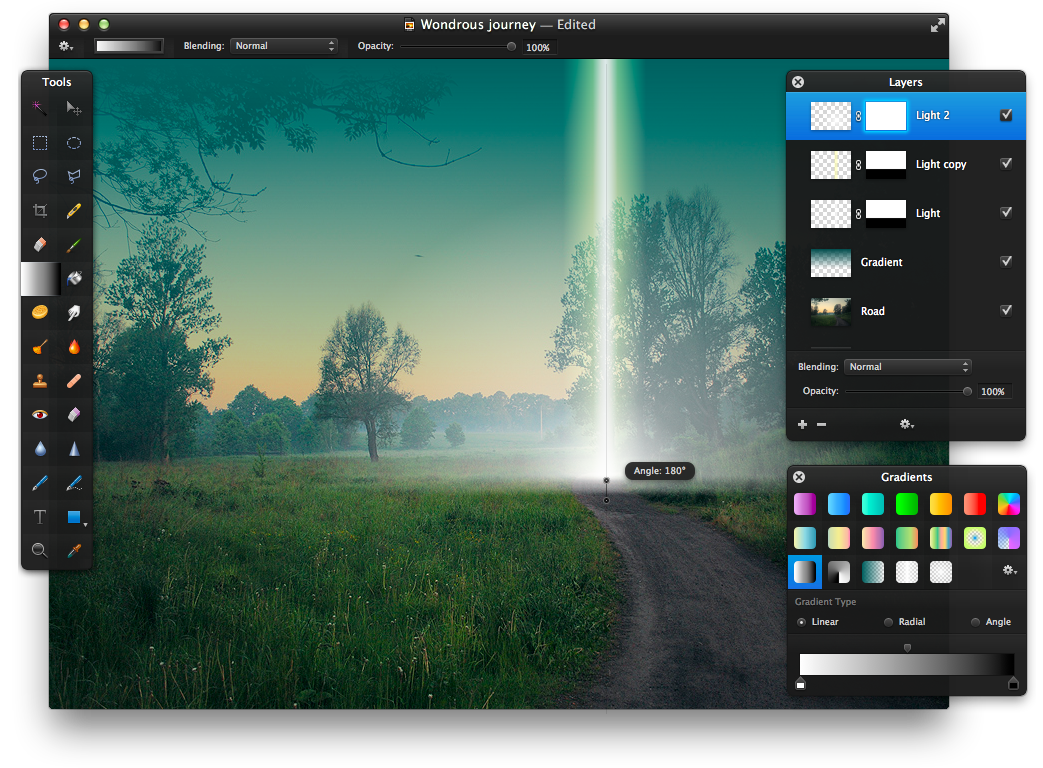
Now, create a new radial gradient. Once again, consult the tip below for further instructions on creating the gradient. Then create a new layer named Light 2 and use the Gradient Tool (G) to fill it with the previously created gradient. Use the image below as a reference.
Tip: To create a gradient used in step 6 open the Gradients Palette (View>Show Gradients). Then click the Action button and choose New Gradient in the drop-down menu and set it’s type to Radial. Click the left color stop to open the Colors Palette and set the color to white (color code – #ffffff). Then drag the slider above the gradient spectrum until it is positioned at 30% as in the example below. After that, click the right color stop, set it’s color to white (color code – #ffffff) and reduce the Opacity to 0%.

STEP 7
To hide the unnecessary parts of the layer Light 2, a layer mask should be added. Right-click the layer Light 2 and choose Add Mask. Use the Gradient Tool (G) to fill the mask with a white to black gradient as it is shown in the example below. Then reduce the layer’s Opacity to 70%.
STEP 8
To make the new layer the same color as the previous gradient duplicate the layer Light 2. Then go to Image>Colorize, set the Saturation to 80%, spin the button around the color wheel until it is positioned at 60º and click OK. Then change the layers Blending to Overlay and increase it’s Opacity to 100%.

STEP 9
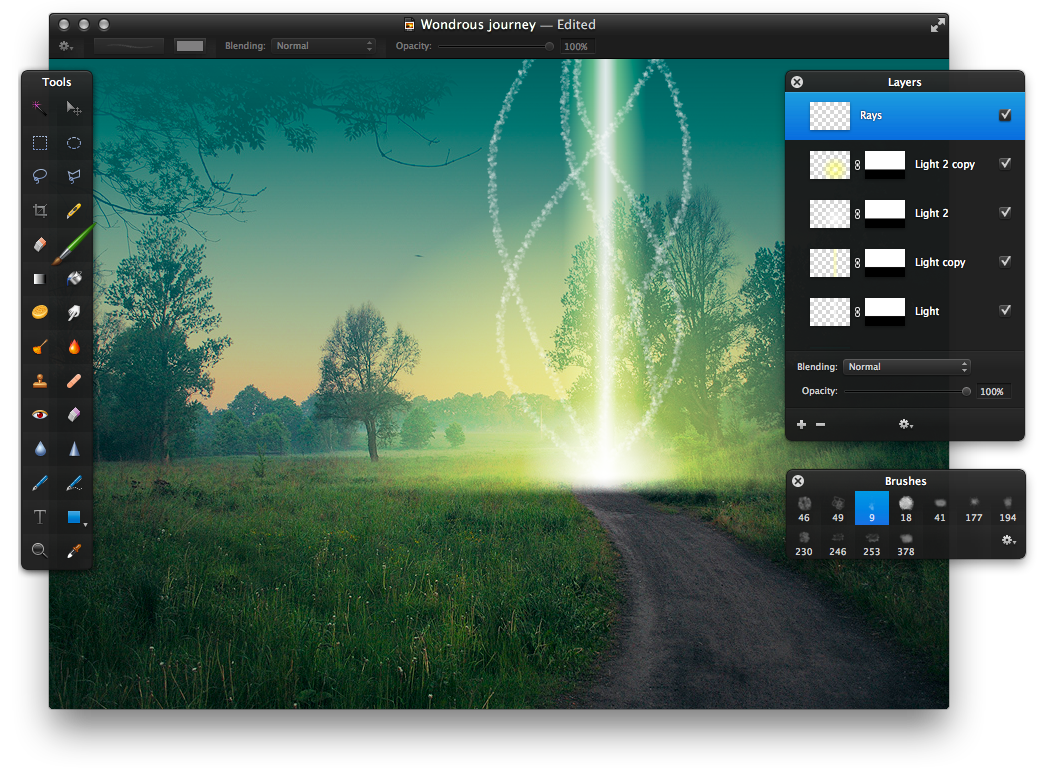
Brushes can be used to add additional lighting effects. First, select the Brush Tool (B) and open the Brushes Palette (View>Show Brushes). Then click the Action button in the palette and choose Smoke in the drop-down menu. Select the brush that is situated third from the right in the first row. Then create a new layer named Rays and use the Brush Tool (B) to draw continuous wavy lines as shown in the example below. Lastly, change the layer’s Blending to Overlay.
STEP 10
To enhance the lighting effect created in step 9 duplicate the layer Rays. Then go to Filter>Blur>Zoom, set the Amount to 20px, use the rope to set the center of the filter underneath the brush strokes and click OK. Use the image below as a reference. Then increase the layer’s Opacity to 100% and leave the Blending unchanged.

STEP 11
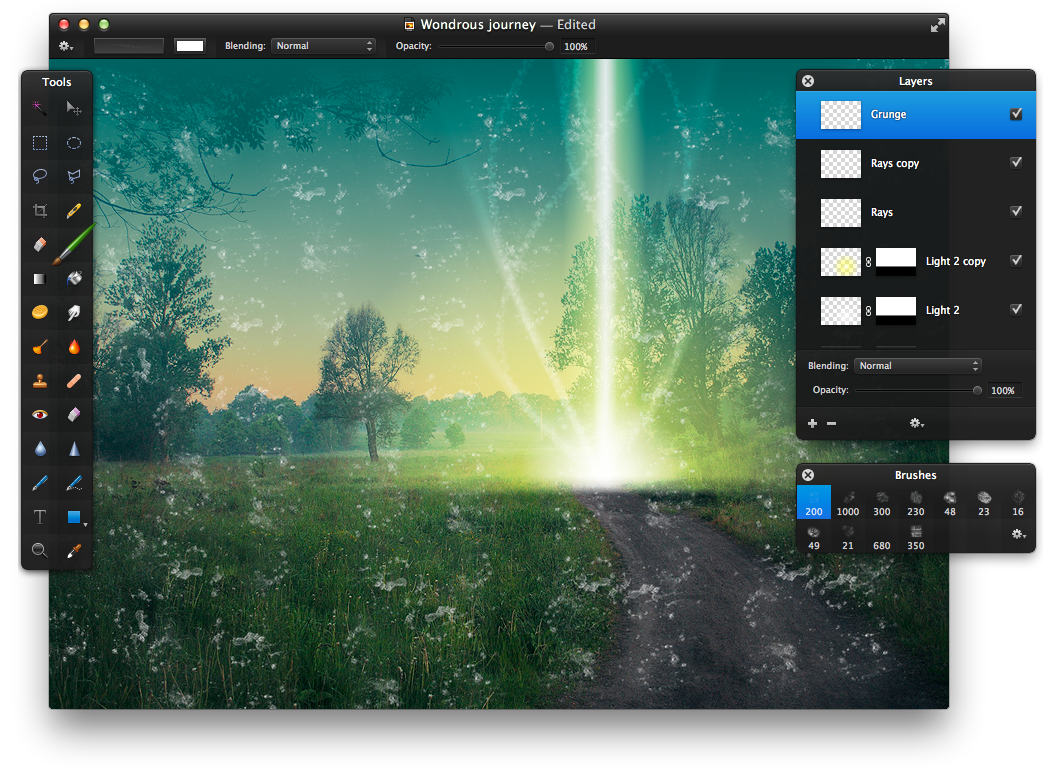
Now let’s make the image look a bit scruffy. First, create a new layer named Grunge. Then open the Brushes Palette (View>Show Brushes), click the Action button and choose Grunge in the drop-down menu. After that, select the Brush Tool (B), set the brush color to white and fill the layer with random strokes of the brush. Lastly, set the layer’s Blending to Overlay and reduce the Opacity to 20%.
STEP 12
Next, let’s enhance the image’s colors and add some artifacts. Create a new layer named Noise and use the Paint Bucket Tool (N) to fill it with black color. Then go to Filter>Noise, set the Amount to 10% and click OK. After that, change the layer’s Blending to Overlay and reduce the Opacity to 30%.

STEP 13
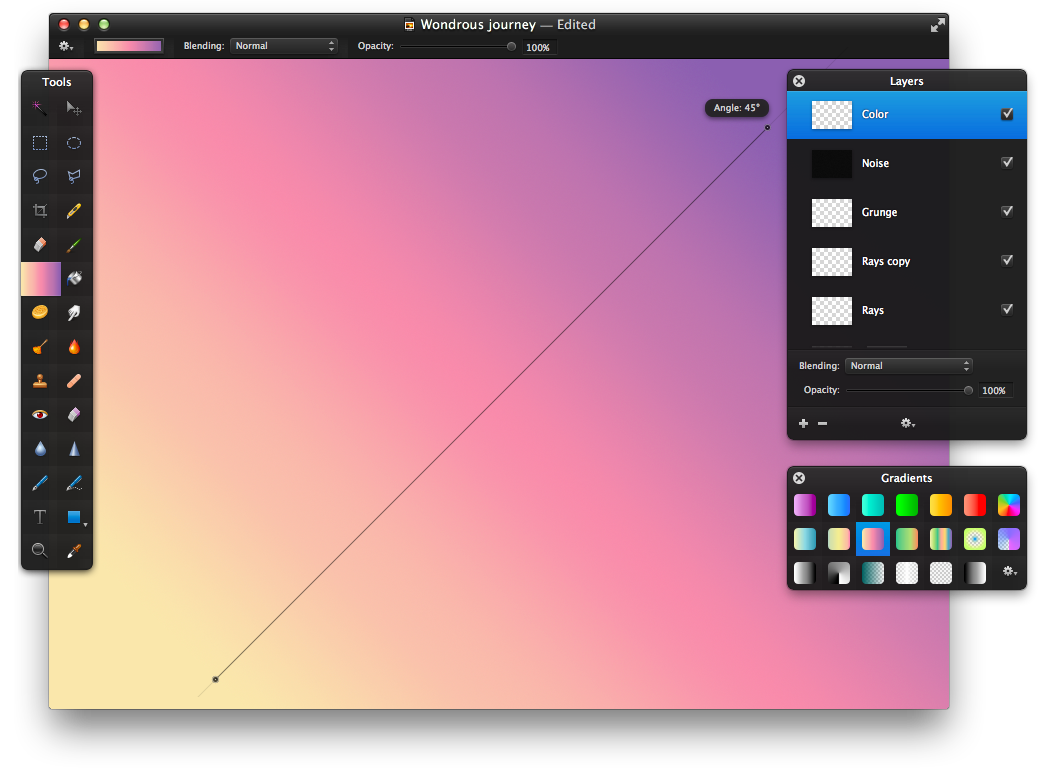
Now, further modify the image’s colors to make all the edited pieces fit right in. Create a new layer named Color and use the Gradient Tool (G) to fill it with a beige to violet color (situated third from the left in the second row of the Gradients Palette) as in the example below. Then invert the layer’s colors (Image>Invert Color), set the Blending to Overlay and reduce the Opacity to 40%.
STEP 14
Finish the composition by adding an vignette effect. Create a new layer named Vignette and use the Paint Bucket Tool (N) to fill it with black color. Then use the Elliptical Marquee Tool (Y) to select the centre of the image. Go to Edit>Refine Selection, set the Feather to 70% and click OK. After that delete the selection by pressing the Delete key on your keyboard. Lastly, reduce the layer’s Opacity to 60%.

CONCLUSION
What is hard to say with words is almost always easier to depict in a picture. Use Pixelmator to display your inner feelings and ideas, allowing others to interpret them and share alike.